MIT 6.858 Computer Systems Security - Lab 3 实验报告
六月 15, 2024 [C/C++] #Web 与前端 #obsidian #开源许可 #编译链接MIT 6.858 Computer Systems Security - Lab 3 实验报告
出处:https://zhuanlan.zhihu.com/p/669739189
0x00. 一切开始之前
本 lab 将教大家使用 符号执行 (symbolic execution) 这一强大的技术来寻找软件中的漏洞,在 lab 的最后我们将建立一个可以在 zoobar web 应用中寻找触发多种漏洞的符号执行系统(准确的说是一个混合执行(concolic execution)系统)
关于什么是 concolic execution,可以看这张图
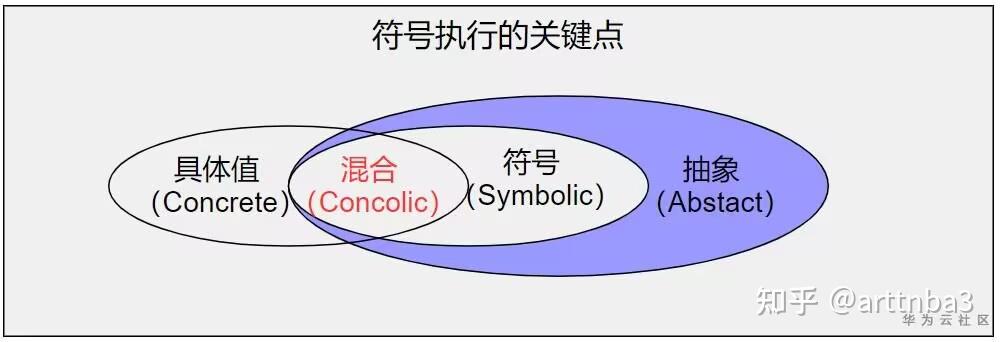
在 EXE paper 中描述了一个用于 C 程序的符号执行系统,为了简单化,该 lab 将通过修改 Python 对象与重载特定方法来为 Python 程序建立一个符号/混合执行系统,类似于 EXE,我们将使用一个 SMT ( Satisfiability Modulo Theories,可满足性模理论)求解器来检查可满足的约束,这意味着我们的求解器可以检查同时包含传统布尔可满足性表达式与涉及其他“理论”的约束如整型、位向量、字符串等
本 lab 初始我们首先要通过计算 32 位有/无符号数的平均值来熟悉 Z3——一个流行的 SMT 求解器,接下来我们将为 Python 整型操作创建 wrappers(类似 EXE 提供了符号变量上的操作置换),并应用调用 Z3 的核心逻辑来探索可能的不同执行路径;最终我们将探索如何将其应用在 web 应用程序上,以对字符串进行求解,我们将为 Python 的字符串操作套一层 wrapper,在 SQLalchemy 数据库接口上应用对符号化友好的(symbolic-friendly)wrapper,并使用这个系统寻找 Zoobar 中的漏洞
上面两段都是抄实验手册的
接下来首先还是惯例地切换到 lab 3 的分支:
$ git commit -am 'lab2 completed'
$ git pull
$ git checkout -b lab3 origin/lab3
这里注意不要将 lab 2 的代码合并到 lab 3 里边,因为我们的符号执行系统无法通过 RPC 追踪多进程间的符号约束,所以我们在一个没有进行权限分离的 Zoobar 上进行符号执行
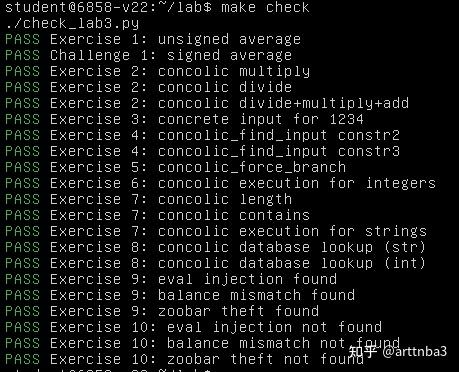
接下来是检查代码可用性:
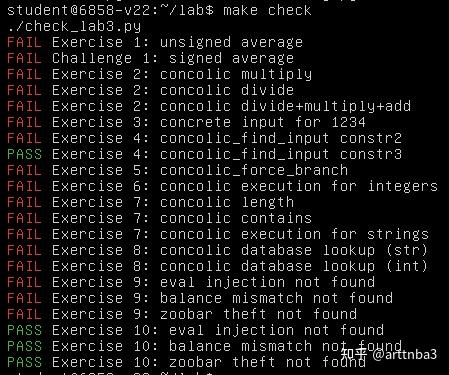
$ make check
结果如下就 ,需要注意的是符号执行系统是 CPU 密集型的,因此对于不开启 KVM 支持的 QEMU 而言会非常慢:
0x01. Using an SMT solver
符号执行的核心是 可满足性模理论求解器(Satisfiability Modulo Theory solver, 即 SMT solver),在本 lab 中我们将使用微软开发的 Z3 solver 的 Python-based API(参见 z3py tutorial & documentation for Z3's Python API),并使用 Z3's support for strings;本 Lab 带有一个构建自 Z3 github repo 的 Z3
实验提供了 int-avg.py 作为使用 Z3 的例子: 计算两个 32 位整型的平均值 ,一个最简单的算法是 (x + y) / 2 ,但这可能会发生整型上溢,从而得到 模 232 上的值(想了解更多,参见 KINT paper )——Z3 可以帮我们检查这个错误:予其一个布尔表达式,Z3 可以告诉我们其是否为真(即可以被满足);若表达式可以为真且包含一些变量,Z3 可以给我们一些使表达式为真的示例变量
现在我们来看这份代码(这里不会仔细讲 Z3 的用法,不懂的 自行查文档),其首先会使用 Z3 创建两个 32 位的位向量 a 与 b:
#!/usr/bin/env python3

import z3

## Construct two 32-bit integer values.  Do not change this code.
a = z3.BitVec('a', 32)
b = z3.BitVec('b', 32)
接下来分别计算有/无符号除法下两数的平均值,注意这里并没有实际进行计算,而仅是保存了符号变量表达式:
## Compute the average of a and b.  The initial computation we provided
## naively adds them and divides by two, but that is not correct.  Modify
## these lines to implement your solution for both unsigned (u_avg) and
## signed (s_avg) division.
##
## Watch out for the difference between signed and unsigned integer
## operations.  For example, the Z3 expression (x/2) performs signed
## division, meaning it treats the 32-bit value as a signed integer.
## Similarly, (x>>16) shifts x by 16 bits to the right, treating it
## as a signed integer.
##
## Use z3.UDiv(x, y) for unsigned division of x by y.
## Use z3.LShR(x, y) for unsigned (logical) right shift of x by y bits.
u_avg = z3.UDiv(a + b, 2)
s_avg = (a + b) / 2
由于 32 位整数加法可能存在溢出,故这里为了求得其正确的平均值,我们将其扩展为两个 33 位的位向量,完成计算后再截断回 32 位(不会导致结果错误,因为 32 位的平均值总会在 32 位内):
## Do not change the code below.

## To compute the reference answers, we extend both a and b by one
## more bit (to 33 bits), add them, divide by two, and shrink back
## down to 32 bits.  You are not allowed to "cheat" in this way in
## your answer.
az33 = z3.ZeroExt(1, a)
bz33 = z3.ZeroExt(1, b)
real_u_avg = z3.Extract(31, 0, z3.UDiv(az33 + bz33, 2))

as33 = z3.SignExt(1, a)
bs33 = z3.SignExt(1, b)
real_s_avg = z3.Extract(31, 0, (as33 + bs33) / 2)
最后就是求解是否存在能够发生整型溢出的约束,即:是否存在这样的两个 32 位整型变量值使得其 32 位下运算结果不与真实计算结果相等:
def printable_val(v, signed):
    if type(v) == z3.BitVecNumRef:
        if signed:
            v = v.as_signed_long()
        else:
            v = v.as_long()
    return v

def printable_model(m, signed):
    vals = {}
    for k in m:
        vals[k] = printable_val(m[k], signed)
    return vals

def do_check(msg, signed, avg, real_avg):
    e = (avg != real_avg)
    print("Checking", msg, "using Z3 expression:")
    print("    " + str(e).replace("\n", "\n    "))
    solver = z3.Solver()
    solver.add(e)
    ok = solver.check()
    print("  Answer for %s: %s" % (msg, ok))

    if ok == z3.sat:
        m = solver.model()
        print("  Example:", printable_model(m, signed))
        print("  Your average:", printable_val(m.eval(avg), signed))
        print("  Real average:", printable_val(m.eval(real_avg), signed))
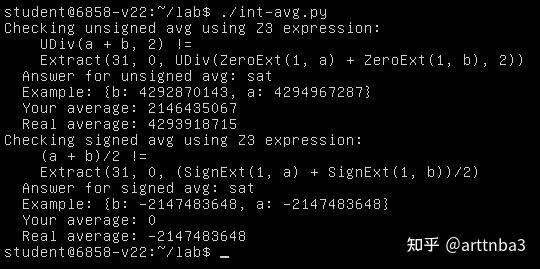
结果如下,Z3 求解器帮助我们找到了这样的值:
接下来是 Exercise 1:通过修改 int-avg.py 中的 u_avg = ... 一行,实现一个正确的函数,以在 32 位运算下正确计算出 a 与 b 的无符号平均值,不能改变操作数的位宽
Exercise 1. Implement a correct function to compute the unsigned average of
aandbusing only 32-bit arithmetic, by modifying theu_avg = ...line inint-avg.py. For the purposes of this exercise, you are not allowed to change the bit-widths of your operands. This is meant to represent the real world, where you cannot just add one more bit to your CPU's register width. You may find it helpful to search online for correct ways to perform fixed-width integer arithmetic. The book Hacker's Delight by Henry S. Warren is a particularly good source of such tricks. Check your averaging function by re-running ./int-avg.py ormake check. If your implementation is correct,int-avg.pyshould produce the messageAnswer for unsigned avg: unsat.
这里笔者给出一个比较笨的解法(毕竟笔者的脑子: (也想不出啥聪明解法 ):
(a / 2) + (b / 2) + ((a % 2) + (b % 2)) / 2
这个算法的思路比较简单,最初的出发点就是两数之和的平均值不会超出 232,那么我们只要先将两数分别除以2再相加就不会发生溢出了,但是奇数除以2会丢失 0.5,所以如果两个数都是奇数的话最后的结果会丢掉1,那么这里我们再将其加上即可
这里需要注意的是 Z3 默认为带符号运算,故这里我们应当使用 z3.UDiv() 来进行无符号除法运算:
u_avg = z3.UDiv(a, 2) + z3.UDiv(b, 2) + ((a % 2) + (b % 2)) / 2
运行 make check,成功通过 Exercise 1:

除了这个算法之外,笔者还了解到有一种算法是利用位运算来进行计算:
(a & b) + ((a ^ b) >> 1)
这个算法的基本原理是先提取出公有部分,再计算私有部分的平均值,最后相加即可得到结果;这个算法也能通过 Exercise 1 ,这里就不重复贴图了
接下来是 Challenge 1:通过修改 int-avg.py 中的 s_avg = ... 一行,实现一个正确的函数,以在 32 位运算下正确计算出 a 与 b 的有符号平均值
Challenge! (optional) For extra credit, figure out how to compute the average of two 32-bit signed values. Modify the
s_avg = ...line inint-avg.py, and run ./int-avg.py ormake check to check your answer. Keep in mind the direction of rounding: 3/2=1 and -3/2=-1, so so the average of 1 and 2 should be 1, and the average of -2 and -1 should be -1. As you explore signed arithmetic, you may find it useful to know that Z3 has two different modulo-like operators. The first is signed modulo, which you get by usinga % bin the Python Z3 API. Here, the sign of the result follows the sign of the divisor (i.e.,b). For example,-5 % 2 = 1. The second is signed remainder, which you get by usingz3.SRem(a, b). Here, the sign of the result follows the sign of the dividend (i.e.,a). With the same example inputs,z3.SRem(-5, 2) = -1.
对于带符号值的运算而言,限制在 32 位内的正确计算便没有那么简单了,若我们直接用上面的式子进行计算则很容易被 Z3 找到能导致运算结果错误的例子:
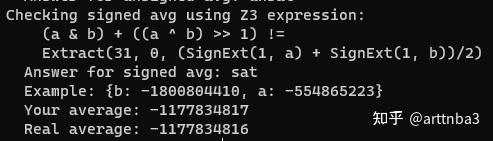
为什么在有符号除法下计算出来的结果不一致呢?这是因为在题目中MIT 非常SB地对于正数除法其选择向下取整,对于负数除法的截断,其选择的是向上取整,但我们的算法是正数与负数皆向下取整,因此计算结果就出现了偏差
由于正数部分没有问题,因此这里我们需要对计算结果为负数的情况进行特殊化处理,在结果为负数时将向下取整变为向上取整,因此最后的计算公式如下:
tmp = (a & b) + ((a ^ b) >> 1)res = tmp + ((tmp >> 31) & (a ^ b))
首先按照我们原来的公式计算出向下取整的结果,接下来对其符号位进行判断,若为 1 则再判断其私有部分平均值的计算是否发生截断(即私有部分和是否为奇数),若是则说明结果发生了向下取整,此时变为向上取整即可
由于要对符号位进行判断,所以这里我们使用 z3.LShR() 将初始运算结果作为无符号整型进行右移操作:
tmp = (a & b) + ((a ^ b) >> 1)
s_avg = tmp + (z3.LShR(tmp, 31) & (a ^ b))
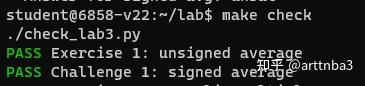
运行结果如下,成功通过 Challenge 1:
0x02. Interlude: what are symbolic and concolic execution?
正如我们前面在 EXE 的论文中所见,符号执行是一种通过观测程序在不同输入下如何表现来进行程序测试的方法,通常而言其目的是为了获得更高的 代码覆盖率 (code coverage)或是路径覆盖率 (path coverage),在安全中其比传统代码执行更能触发罕见的可能包含漏洞的代码路径
从更高层次而言,若我们要构建一个符号执行系统,我们需要解决以下几点:
- 由于程序包含基于输入的中间值(例如输入两个整型并计算平均值,并存放在一些变量中),我们需要记住输入与这些中间值间的关系,通常这通过允许变量或内存位置有 具体的 (concrete,例如 114514 这样的实际值) 或 符号的 (symbolic,例如我们在上一小节构建的符号变量) 值
- 我们需要根据输入来确定要执行的控制流分支,这归结于在程序每次发生分支时构建符号约束,在程序选择一些特定分支时描述布尔条件(以程序原有输入的形式);由于我们持续保存中间值与程序原有输入的间隙,我们并不需要通过原有输入来计算约束,这些约束就像我们在前文中用来寻找整型中漏洞的约束;确定控制流约束非常重要,因为若程序初始时进入了特定分支路径,我们想要知道如何让他走到另一条路径来寻找是否存在漏洞,在 EXE 的论文中使用了一个 C-to-C 的翻译器来在所有的分支上插入他们的代码
- 对于每一条上述分支,我们需要决定是否有一个输入能够让程序在一条分支上执行另一条路径(更准确地说,我们考虑整个控制流路径而非单个路径),这帮助我们在程序中寻找可以让我们通过调整输入来影响的控制流条件,所有的符号执行系统都基于 SMT 求解器来完成这些工作
- 我们需要确定我们在测试中寻找的是什么,这是我们从程序中确保 不变量 (invariant)来考虑的最佳方法,而符号执行寻找改变这些常量的输入(笔者也没咋读明白,可以看实验手册原句);我们可以寻找的事物之一是程序崩溃(crashes,即不变量是 我们的程序不应当崩溃 ),在 C 程序中这非常有意义,因为 crashes 通常指示了代表漏洞的内存损坏,在 Python 这样更高级的语言中在设计上并不存在内存损坏,但我们仍然可以寻找如 Python 代码级的代码注入攻击(例如
eval())或是特定于某种应用的影响安全的不变量 - 最终,对于给出程序中所有可能执行的控制流路径,我们需要决定该尝试哪条路径,因为路径数量会随着程序规模的增大而快速增长,我们不可能尝试所有的路径,因此符号执行系统通常包含确定哪一条路径更有希望发现破坏不变量的某种 调度器 (scheduler)或 搜索策略 (search strategy),一个简单的搜索策略例子便是尝试未执行过的路径,这代表着更高的代码覆盖率与未被发现的漏洞的存在的可能性
与符号执行相对的一个选择是 fuzzing (又称 fuzz-testing,模糊测试),其选择了一个随机化方案:不同于关注触发应用中不同代码路径的原因,fuzzing 会创建随机的具体值交给程序执行并检查其行为;虽然这比符号执行更简单,但通常很难构造能满足程序代码中一些特定情况的输入
构建符号执行系统的一个挑战是我们的系统需要知道如何在符号值上执行所有可能的操作(上面的 Step 1 & 2),在本 Lab 中我们将在 Python 对象(更准确地说,整型与字符串)上实践,对于符号执行而言这很有挑战性,因为 Python 对象可以实现的操作有很多
幸运的是我们还有一个更简单的选择—— 混合执行 (concolic execution),介于完全随机的模糊测试与完全的符号执行之间,相较于跟踪纯净的符号值(如 EXE 中所做),其思想是:对于从输入中得到的变量,我们可以同时保存一个具体值与一个符号值,由此:
- 若我们的 concolic system 知道应用的行为,我们可以像符号执行那样运行(除了我们还会同时传播每个值的 concrete 部分);例如,假设我们有两个 concolic 整型变量
aa与bb,其有着具体值5与6,并对应符号表达式a与b,此时若应用创建了一个变量cc = aa + bb,其会同时有着具体值11及符号表达式a + b;类似地,若应用在cc == 12的分支上执行,程序可以像分支为假一样执行,并记录对应的符号分支条件a + b != 12 - 若我们的 concolic system 不知道应用的当前行为,应用将只会得到具体的值;例如若应用将
cc写入文件中,或者是传递到外部库中,代码仍可以使用具体值11如同应用正常运行那样继续执行
对于本 lab 而言,混合执行的好处是我们并不需要完全完成对符号值的操作支持,我们只需要支持足够发现漏洞的操作即可(实际上大部分挖洞系统也是如此),不过若应用执行了我们所不支持的操作,我们将失去对符号部分的跟踪,并无法对这些路径进行符号执行式的(symbolic-execution-style)探索,若想了解更多可以参见 DART paper
0x03. Concolic execution for integers
首先我们将为整型值构建一个混合执行系统,本 Lab 为我们的混合执行提供的框架代码位于 symex/fuzzy.py 中,其实现了几个重要的抽象层:
- 抽象语法树(The AST):与此前我们在
int-avg.py中使用 Z3 表达式来表示符号值所不同的是,本 Lab 构建了其自己的抽象语法树(abstract syntax tree)来表达符号表达式,一个 AST 节点可以是一个简单的变量(sym_str或sym_int对象)、一个常量(const_int、const_str或const_bool对象)、或是一些将其他 AST 节点作为参数的函数或操作符(例如sym_eq(a, b)表示布尔表达式a==b,其中a与b都是 AST 节点,或是sym_plus(a, b)表示整型表达式a + b) 每个 AST 节点n都可以使用z3expr(n)转化为 Z3 表达式,这由调用n._z3expr完成,即每个 AST 节点都实现了返回对应 Z3 表达式的_z3expr方法 我们使用自己的 AST 层而非使用 Z3 的符号表示的原因是因为我们需要实现一些 Z3 表示难以完成的操作,此外我们需要分出一个独立的进程来调用 Z3 的求解器,以在 Z3 求解器耗时过长时杀死进程——将约束归为不可解(这种情况下我们可能失去这些路径,但至少我们会让程序探索其他路径);使用我们自己的 AST 能让我们将 Z3 状态完全独立在 fork 出的进程里 - 混合封装(The concolic wrappers):为了拦截 python-level 的操作并进行混合执行,我们将常规的
int与str对象替换成了混合的子类:concolic_int继承自int而concolic_str继承自str,每一个混合封装都同时存储一个具体值(self.__v)与一个符号表达式(与 AST 节点,在self.__sym),当应用在计算混合值表达式(例如a+1中的a为concolic_int),我们需要拦截该操作并返回一个同时包含具体值与符号表达式的的混合值 为了实现这样的拦截操作,我们重载了concolic_int与concolic_str类中的一些方法,例如concolic_int.__add__在上面的例子a + 1中会被调用并返回一个新的混合值表示结果 原则上我们应该也要有一个concolic_bool作为bool的子类,不幸的是在 Python 中bool不能被继承(参见这里 与 这里),于是我们创建了函数concolic_bool作为代替,当我们创建一个混合布尔值时,程序会按其值进行分支,故concolic_bool也会为当前路径条件添加一个约束(布尔值的符号表达式与具体值相等的约束),并返回一个具体的布尔值 - 具体输入(The concrete inputs):在混合执行下被测试的程序输入都存储在
concrete_values字典中,在该字典中存储了程序输入的字符串名字,并将每个名字映射到对应的输入值(整型变量的值为python整型,字符串变量为python字符串)concrete_value被设为全局变量的原因是应用通过调用fuzzy.mk_str(name)或fuzzy.mk_int(name)来创建一个混合字符串或混合整型,其返回一个混合值,其中的符号部分为一个新的 AST 节点对应到一个名为name的变量,但具体值被在concrete_values中查找,若字典中没有与之关联的变量,系统将其设为默认的初始值(整型为0,字符串为空串) 混合执行框架在一个InputQueue对象中维持一个待尝试的不同输入的队列,框架首先会添加一个初始输入(空字典{}),之后执行代码,若应用进入了分支,混合执行系统将唤醒 Z3 来带来 新的输入以测试代码中的其他分支,将这些输入放到输入队列中,并保持迭代直到没有输入可以尝试 - 可满足性模理论求解器(The SMT solver):
fork_and_check(c)函数会检查约束c(一个 AST 节点)是否为可满足的表达式,并返回一对值:可满足性状态ok及示例模型(分配给变量的值),若约束可以被满足则ok为z3.sat,若约束不可被满足则ok为z3.unsat或z3.unknown;该函数内部会 fork 一个独立的进程来运行 Z3 求解器,若耗时超过z3_timeout则杀死进程并返回z3.unknown - 当前路径条件(The current path condition):当应用执行并基于混合值决定控制流时(参见上面关于
concolic_bool的讨论),表示该分支的约束会被添加到cur_path_constr列表中,为了生成能够沿着一条分支从一个点进行不同选择的输入,所需的约束为路径上该点之前的约束集合,加上该点的反向约束;为了帮助调试与启发式搜索,触发了分支的代码行的信息会被存放在cur_path_constr_callers列表中
接下来我们的工作是完成对 concolic_int 的实现,并将代码应用于混合执行循环的核心,本 Lab 提供了两个测试程序: check-concolic-int.py 与 check-symex-int.py
混合执行框架代码浅析 - Part 1
在做 Exercise 之前,我们先看一下这个混合执行框架的代码结构,其核心代码主要位于 symex/fuzzy.py 中
- AST 节点
首先是 AST 节点,作为所有符号类的父类而存在,定义比较简单:
class sym_ast(object):
  def __str__(self):
    return str(self._z3expr())
- 符号运算
然后是 sym_func_apply 类,作为所有符号操作的父节点,这里主要重载了 __eq__() 和 __hash__() 方法,用于比较与计算哈希值,比较的方法就是判断是否所有参数相等,哈希值的计算则是所有参数的哈希值进行异或:
class sym_func_apply(sym_ast):
  def __init__(self, *args):
    for a in args:
      if not isinstance(a, sym_ast):
        raise Exception("Passing a non-AST node %s %s as argument to %s" % \
                        (a, type(a), type(self)))
    self.args = args

  def __eq__(self, o):
    if type(self) != type(o):
      return False
    if len(self.args) != len(o.args):
      return False
    return all(sa == oa for (sa, oa) in zip(self.args, o.args))

  def __hash__(self):
    return functools.reduce(operator.xor, [hash(a) for a in self.args])
然后是三个类 sym_unop 、sym_binop 、sym_triop,表示带有1、2、3个操作数的封装,可以使用 a 、b 、c 获得第 1、2、3个操作数:
class sym_unop(sym_func_apply):
  def __init__(self, a):
    super(sym_unop, self).__init__(a)

  @property
  def a(self):
    return self.args[0]

class sym_binop(sym_func_apply):
  def __init__(self, a, b):
    super(sym_binop, self).__init__(a, b)

  @property
  def a(self):
    return self.args[0]

  @property
  def b(self):
    return self.args[1]

class sym_triop(sym_func_apply):
  def __init__(self, a, b, c):
    super(sym_triop, self).__init__(a, b, c)

  @property
  def a(self):
    return self.args[0]

  @property
  def b(self):
    return self.args[1]

  @property
  def c(self):
    return self.args[2]
基于 sym_func_apply 与 op 类,封装了相等比较、与、或、非四个操作,其实现原理主要还是转成 Z3 表达式后利用 Z3 的与或非进行运算::
## Logic expressions

class sym_eq(sym_binop):
  def _z3expr(self):
    return z3expr(self.a) == z3expr(self.b)

class sym_and(sym_func_apply):
  def _z3expr(self):
    return z3.And(*[z3expr(a) for a in self.args])

class sym_or(sym_func_apply):
  def _z3expr(self):
    return z3.Or(*[z3expr(a) for a in self.args])

class sym_not(sym_unop):
  def _z3expr(self):
    return z3.Not(z3expr(self.a))
符号数的加减乘除比较等操作都是基于上面封装的 op 类完成的:
乘除等运算需要我们在后续的 Exercise 中自行实现
class sym_lt(sym_binop):
  def _z3expr(self):
    return z3expr(self.a) < z3expr(self.b)

class sym_gt(sym_binop):
  def _z3expr(self):
    return z3expr(self.a) > z3expr(self.b)

class sym_plus(sym_binop):
  def _z3expr(self):
    return z3expr(self.a) + z3expr(self.b)

class sym_minus(sym_binop):
  def _z3expr(self):
    return z3expr(self.a) - z3expr(self.b)
- 常量
字符串常量 const_str 、整型常量 const_int 、布尔常量 const_bool 的实现比较简单,主要就是继承自 sym_ast 并且储存对应的值,其中字符串常量在转为 Z3 表达式时会调用 z3.StringVal():
class const_str(sym_ast):
  def __init__(self, v):
    self.v = v

  def __eq__(self, o):
    if not isinstance(o, const_str):
      return False
    return self.v == o.v

  def __hash__(self):
    return hash(self.v)

  def _z3expr(self):
    return z3.StringVal(self.v)

class const_int(sym_ast):
  def __init__(self, i):
    self.i = i

  def __eq__(self, o):
    if not isinstance(o, const_int):
      return False
    return self.i == o.i

  def __hash__(self):
    return hash(self.i)

  def _z3expr(self):
    return self.i

class const_bool(sym_ast):
  def __init__(self, b):
    self.b = b

  def __eq__(self, o):
    if not isinstance(o, const_bool):
      return False
    return self.b == o.b

  def __hash__(self):
    return hash(self.b)

  def _z3expr(self):
    return self.b
- 符号变量
在该框架中定义了两种类型的符号变量:sym_int 与 sym_str,都是直接基础自 AST 节点类:
## Arithmetic

class sym_int(sym_ast):
  def __init__(self, id):
    self.id = id

  def __eq__(self, o):
    if not isinstance(o, sym_int):
      return False
    return self.id == o.id

  def __hash__(self):
    return hash(self.id)

  def _z3expr(self):
    return z3.Int(self.id)

###...

## String operations

class sym_str(sym_ast):
  def __init__(self, id):
    self.id = id

  def __eq__(self, o):
    if not isinstance(o, sym_str):
      return False
    return self.id == o.id

  def __hash__(self):
    return hash(self.id)

  def _z3expr(self):
    return z3.Const(self.id, z3.StringSort())
- 混合变量
正如前文所言,我们实际上在混合执行引擎当中使用的为混合型(concolic)的变量来储存约束值,框架中提供了三种类型的混合变量——concolic_int (整型)、 concolic_str(字符串)、concolic_bytes(字符数组),其中具体值(conctre value)存放在 __v 成员中,符号值(symbolic value)存放在 __sym 中
主要是大量的运算符重载,这里就不贴完整代码了,可以自己去看(笑):
class concolic_int(int):
  def __new__(cls, sym, v):
    self = super(concolic_int, cls).__new__(cls, v)
    self.__v = v
    self.__sym = sym
    return self

## ...

class concolic_str(str):
  def __new__(cls, sym, v):
    assert type(v) == str
    self = super(concolic_str, cls).__new__(cls, v)
    self.__v = v
    self.__sym = sym
    return self

##...

class concolic_bytes(bytes):
  def __new__(cls, sym, v):
    assert type(v) == bytes
    self = super(concolic_bytes, cls).__new__(cls, v)
    self.__v = v
    self.__sym = sym
    return self

##...
接下来是 Exercise 2:通过增加整型乘法与除法支持来完成对 symex/fuzzy.py 中 concolic_int 的实现,我们需要重载额外的方法并为乘除法运算添加 AST 节点,并为这些 AST 节点应用 _z3expr
Exercise 2. Finish the implementation of
concolic_intby adding support for integer multiply and divide operations. You will need to overload additional methods in theconcolic_intclass (see the documentation for operator functions in Python 3), add AST nodes for multiply and divide operations, and implement_z3exprappropriately for those AST nodes. Look for the commentsExercise 2: your code hereinsymex/fuzzy.pyto find places where we think you might need to write code to solve this exercise. Run ./check-concolic-int.py ormake check to check that your changes toconcolic_intwork correctly.
我们首先实现符号变量乘除所需的 sym_binop 子类,这里我们参照前面的加减运算直接调用 z3expr() 来返回 Z3 表达式即可
需要注意的是虽然 python 的除法运算有 / 与 //两种,但是 Z3并不支持 ArithRef 与 int 直接进行 // 运算,所以这里我们只实现一个普通的乘法即可:
## Exercise 2: your code here.
## Implement AST nodes for division and multiplication.
class sym_mul(sym_binop):
  def _z3expr(self):
    return z3expr(self.a) * z3expr(self.b)

class sym_div(sym_binop):
  def _z3expr(self):
    return z3expr(self.a) / z3expr(self.b)
接下来我们重写 concolic_int 的乘法与除法,我们先参考一下 concolic_int中的加法运算方式:、
- 首先判断运算对象是否为
concolic_int,若是则将自身具体值加上对象具体值,否则直接加上该对象,结果存放到res - 创建一个新的
concolic_int实例作为返回值,res作为其具体值部分,创建两个ast实例并利用sym_plus()计算结果作为新 concolic_int 的符号值部分
  def __add__(self, o):
    if isinstance(o, concolic_int):
      res = self.__v + o.__v
    else:
      res = self.__v + o
    return concolic_int(sym_plus(ast(self), ast(o)), res)
那么我们的乘除法其实依葫芦画瓢即可,这里需要注意的是我们要同时实现 / 与 // 两种除法运算:
  ## Exercise 2: your code here.
  ## Implement symbolic division and multiplication.
  def __mul__(self, o):
    if isinstance(o, concolic_int):
      res = self.__v * o.__v
    else:
      res = self.__v * o
    return concolic_int(sym_mul(ast(self), ast(o)), res)

  def __truediv__(self, o):
    if isinstance(o, concolic_int):
      res = self.__v / o.__v
    else:
      res = self.__v / o
    return concolic_int(sym_div(ast(self), ast(o)), res)

  def __floordiv__(self, o):
    if isinstance(o, concolic_int):
      res = self.__v // o.__v
    else:
      res = self.__v // o
    return concolic_int(sym_div(ast(self), ast(o)), res)
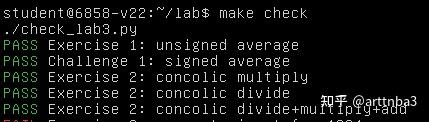
运行,成功通过 Exercise 2:
然后是 Exercise 3,主要是让我们熟悉混合执行系统的使用方式,这里提供的途径是修改 symex_exercises.py 以给予测试系统正确的输入:
Exercise 3. An important component of concolic execution is
concolic_exec_input()insymex/fuzzy.py. We have given you the implementation. You will use it to build a complete concolic execution system. To understand how to useconcolic_exec_input(), you should create an input such that you pass the first check insymex/check-symex-int.py. Don't modifysymex/check-symex-int.pydirectly, but instead modifysymex_exercises.py. Run ./check-symex-int.py ormake check to check your solution.
混合执行框架的核心组件便是 symex/fuzzy.py 中的 concolic_exec_input() ,题目说后续我们将用其实现一个完整的混合执行系统,那我们先来看其相关的具体实现
混合执行框架代码浅析 - Part 2
- 具体值字典 - ConcreteValues
如前文所言,在混合执行下被测试的程序输入都存储在一个全局字典中,实为一个ConctreteValues 类对象,实际上就是 python 字典的一个 wrapper
# ConcreteValues maintains a dictionary of variables name to values.
# If a variable is created and it doesn't exist, we use a default
# value for the variable (0 for int and '' for string).
class ConcreteValues(object):
  def __init__(self):
    self.concrete_values = {}
在 symex/fuzzy.py 中有一个全局变量 current_concrete_values,实际上就是我们前面所说的全局具体值字典,我们可以使用ConctreteValues.mk_global() 使该对象变为全局引用,即我们每次使用只需要创建一个ConctreteValues 对象即可:
# During concolic execution, new variables will be added to
# current_concrete_values, which is an instance of ConcreteValues.
# This variable is global because application code, the concolic
# Execution engine, and test code, all create new variables.  We make
# it global so that we don't have to modify application code.  At the
# start of a concolic execution we will set this variable to the
# concrete values to be used.

current_concrete_values=None

#...

  def mk_global(self):
    global current_concrete_values
    current_concrete_values = self
在该类中有三个查询字典内 id 对应具体值并返回混合值的函数,若 id 不在字典内则进行添加,同时在 symex/fuzzy.py 中带有三个对这些函数的 wrapper:
  def mk_int(self, id, initval):
    if id not in self.concrete_values:
      self.concrete_values[id] = initval
    return concolic_int(sym_int(id), self.concrete_values[id])

  def mk_str(self, id, initval):
    if id not in self.concrete_values:
      self.concrete_values[id] = initval
    return concolic_str(sym_str(id), self.concrete_values[id])

  def mk_bytes(self, id, initval):
    if id not in self.concrete_values:
      self.concrete_values[id] = initval
    return concolic_bytes(sym_str(id), self.concrete_values[id])

#...

# Wrapper functions to allow application code to create new
# variables. They will be added to the current global current
# concrete values.
def mk_int(id, initval):
  global current_concrete_values
  return current_concrete_values.mk_int(id, initval)

def mk_str(id, initval):
  global current_concrete_values
  return current_concrete_values.mk_str(id, initval)

def mk_bytes(id, initval):
  global current_concrete_values
  return current_concrete_values.mk_bytes(id, initval)
除了上面的函数以外,也可以直接使用 add() 成员函数来向字典内添加映射:
  def add(self, id, v):
    self.concrete_values[id] = v
以及还有一个 canonical_rep() 成员函数用以返回字典中的键值对元组排序列表,以及 var_names() 用以返回 id 列表:
  def canonical_rep(self):
    return sorted(self.concrete_values.items())

#...

  def var_names(self):
    return self.concrete_values.keys()
以及一个 inherit() 成员函数用以从另一个字典中拷贝键值对:
  def inherit(self, o):
    for id in o.concrete_values:
      if id not in self.concrete_values:
        self.concrete_values[id] = o.concrete_values[id]
- concolic_exec_input() - 输入执行
该函数内容用以根据给予的字典对传入的函数进行执行,整体逻辑比较简单:
- 初始化两个全局空列表
cur_path_constr(当前路径的条件约束)与cur_path_constr_callers(当前路径的信息) - 调用
concrete_values.mk_global()使其成为一个全局字典 - 调用传入的函数指针来获得一个值
v,若参数verbose > 1则打印两个列表的内容 - 最后的返回值为
(v, cur_path_constr, cur_path_constr_callers)
# Concolically execute testfunc with the given concrete_values. It
# returns the value testfunc computes for the given concrete_values
# and the branches it encountered to compute that result.
def concolic_exec_input(testfunc, concrete_values, verbose = 0):
  global cur_path_constr, cur_path_constr_callers
  cur_path_constr = []
  cur_path_constr_callers = []

  if verbose > 0:
    print('Trying concrete value:', concrete_values)

  # make the concrete_value global so that new variables created
  # by testfunc(), directly or indirectly, will be added to
  # concrete_values.
  concrete_values.mk_global()
  v = testfunc()

  if verbose > 1:
    print('Test generated', len(cur_path_constr), 'branches:')
    for (c, caller) in zip(cur_path_constr, cur_path_constr_callers):
      print(indent(z3expr(c)), '@', '%s:%d' % (caller[0], caller[1]))

  return (v, cur_path_constr, cur_path_constr_callers)
可以看到在该函数中并没有更改路径约束与信息的列表,实际上这在 add_constr() 中完成,该函数在 concolic_bool() 中调用,将约束信息进行添加:
def add_constr(e):
  global cur_path_constr, cur_path_constr_callers
  cur_path_constr.append(simplify(e))
  cur_path_constr_callers.append(get_caller())

def concolic_bool(sym, v):
  ## Python claims that 'bool' is not an acceptable base type,
  ## so it seems difficult to subclass bool.  Luckily, bool has
  ## only two possible values, so whenever we get a concolic
  ## bool, add its value to the constraint.
  add_constr(sym_eq(sym, ast(v)))
  return v
而 concolic_bool() 实际上在 concolic_int 与 concolic_str 的运算符重载中进行调用,这也是为什么每次执行 concolic_exec_input() 都要重新将路径约束与信息列表清空的缘故,这里以 concolic_int中的 __cmp__ 运算符为例:
  def __cmp__(self, o):
    res = int(self.__v).__cmp__(int(o))
    if concolic_bool(sym_lt(ast(self), ast(o)), res < 0):
      return -1
    if concolic_bool(sym_gt(ast(self), ast(o)), res > 0):
      return 1
    return 0
我们接下来来看 symex_exercises.py 里有啥,主要就一个 make_a_test() 函数,我们需要在其中完成全局具体值字典 concrete_values 的构建:
import symex.fuzzy as fuzzy

def make_a_test_case():
  concrete_values = fuzzy.ConcreteValues()
  ## Your solution here: add the right value to concrete_values
  return concrete_values
那么我们该如何修改 symex_exercises.py 中创建的字典呢?我们先看一下 Exercise 3 的评判标准,在 check_lab3.py 中检测的是运行 check-symex-int.py 后要输出 "Found input for 1234" 字符串:
def check_symex_int():
    sh('python3 check-symex-int.py >/tmp/lab3.log')
    if 'Found input for 1234' in file_read('/tmp/lab3.log'):
        log(green("PASS"), "Exercise 3: concrete input for 1234")
    else:
        log(red("FAIL"), "Exercise 3: concrete input for 1234")
我们接下来来看 check-symex-int.py ,其开头的逻辑如下,r 的值为 1234 即可通过 Exercise 3:
## This test case checks that you provided the right input in symex_exercises.
print('Calling f with a specific input..')
v = symex_exercises.make_a_test_case()
(r, constr, callers) = fuzzy.concolic_exec_input(test_f, v, verbose=1)
if r == 1234:
    print("Found input for 1234")
else:
    print("Input produced", r, "instead of 1234")
如前面我们对 concolic_exec_input() 的分析,r 的值由传入的函数指针决定,故我们来看 test_f() 的逻辑,主要就是用 mk_int() 从全局具体值字典中获取 id 为 i 的值传入 f() 中进行运算,若不存在 i 则 i 会被默认赋值 0 :
def f(x):
    if x == 7:
        return 100
    if x*2 == x+1:
        return 70
    if x > 2000:
        return 80
    if x*2 == 1000:
        return 30000
    if x < 500:
        return 33
    if x // 123 == 7:
        return 1234
    return 40

def test_f():
    i = fuzzy.mk_int('i', 0)
    v = f(i)
    return v
由函数 f() 我们可以知道的是我们只需要向具体值字典中添加一个 i = 123 * 7 的值即可让 test_f() 返回 1234,故修改 symex_exercises.py 如下,这里用 mk_int() 和 add() 都可以:
import symex.fuzzy as fuzzy

def make_a_test_case():
  concrete_values = fuzzy.ConcreteValues()
  ## Your solution here: add the right value to concrete_values
  concrete_values.add('i', 123 * 7)
  return concrete_values
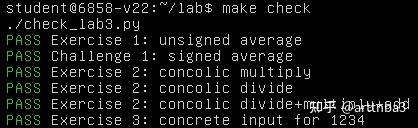
运行,成功通过 Exercise 3:
接下来是 Exercise 4,完成 symex/fuzzy.py 中 concolic_find_input 的实现:
Exercise 4. Another major component in concolic execution is finding a concrete input for a constraint. Complete the implementation of
concolic_find_inputinsymex/fuzzy.pyand make sure you pass the second test case ofsymex/check-symex-int.py. For this exercise, you will have to invoke Z3, along the lines of(ok, model) = fork_and_check(constr)(see the comments in the code). Run ./check-symex-int.py ormake check to check your solution.
在该函数当中我们需要完成对约束的求解并返回对应的结果,因此这里需要使用 Z3 求解器来完成约束求解过程,不过这里已经将调用 Z3 的流程在 fork_and_check() 中完成封装,我们只需要调用该函数进行求解即可,那么我们先来看 fork_and_check() 的具体实现:
- 创建子进程调用
fork_and_check_worker()进行约束求解,父子进程通过管道通信 - 父进程等待子进程的
SIGALRM信号,若z3_timeout秒后未收到,杀死子进程 - 从管道接收结果并返回,若超时(子进程被杀,管道关闭)则返回
(z3.unknown, None)
## Support for forking because z3 uses lots of global variables

## timeout for Z3, in seconds
z3_timeout = 5

##...

def fork_and_check(constr):
  constr = simplify(constr)

  parent_conn, child_conn = multiprocessing.Pipe()
  p = multiprocessing.Process(target=fork_and_check_worker,
                              args=(constr, child_conn))
  p.start()
  child_conn.close()

  ## timeout after a while..
  def sighandler(signo, stack):
    print("Timed out..")
    # print z3expr(constr).sexpr()
    p.terminate()

  signal.signal(signal.SIGALRM, sighandler)
  signal.alarm(z3_timeout)

  try:
    res = parent_conn.recv()
  except EOFError:
    res = (z3.unknown, None)
  finally:
    signal.alarm(0)

  p.join()
  return res
接下来我们来看 fork_and_check_workder() 的具体实现:
- 新建一个 Z3 求解器将转化为字符串的约束表达式传入,调用
Solver.check()求解 - 若求解成功,调用
Solver.model()获得求解结果 - 判断结果中变量类型并转换为整型/字符串,对于字符串做额外处理,将结果放到一个
字符串→结果映射的字典中并返回
Z3 这玩意用起来确实方便,不愧是微软大爹
def fork_and_check_worker(constr, conn):
  s = z3.Solver()
  s.add(z3expr(constr))
  ok = s.check()
  m = {}
  if ok == z3.sat:
    z3m = s.model()
    for k in z3m:
      v = z3m[k]
      if v.sort() == z3.IntSort():
        m[str(k)] = v.as_long()
      elif v.sort() == z3.StringSort():
        ## There doesn't seem to be a way to get the raw string
        ## value out of Z3..  Instead, we get the escaped string
        ## value.  We need to jump through hoops to unescape it.
        x = v.as_string()
        u = x.encode('latin1').decode('unicode-escape')
        m[str(k)] = u
      else:
        raise Exception("Unknown sort for %s=%s: %s" % (k, v, v.sort()))
  conn.send((ok, m))
  conn.close()
那么现在我们可以完成 Exercise 4 了,我们只需要调用 fork_and_check() 进行求解即可,需要注意的是我们返回的字典中的键值对应当只包含 ok_names 参数中所需要的键,若 ok_names == None 则将所有的键值对添加到字典中:
# Given a constraint, ask Z3 to compute concrete values that make that
# constraint true. It returns a new ConcreteValues instance with those
# values.  Z3 produces variables that don't show up in our
# applications and in our constraints; we filter those by accepting
# only variables names that appear in ok_names.
def concolic_find_input(constraint, ok_names, verbose=0):
  ## Invoke Z3, along the lines of:
  ##
  ##     (ok, model) = fork_and_check(constr)
  ##
  ## If Z3 was able to find example inputs that solve this
  ## constraint (i.e., ok == z3.sat), make a new input set
  ## containing the values from Z3's model, and return it.
  (ok, model) = fork_and_check(constraint)
  cv = ConcreteValues()
  if ok == z3.sat:
    sat = True
    res_names = model.keys() if ok_names is None else ok_names
    for k in res_names:
      cv.add(k, model[k])
  else:
    sat = False
  return sat, cv
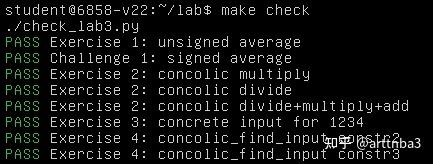
成功通过 Exercise 4:
然后是 Exercise 5, 完成 symex/fuzzy.py 中 concolic_force_branch 的实现:
提前说一下,这个 Exercise 5 的检查非常松,不要以为通过检查就是真的 Pass 了,最好自己再看看代码逻辑是否符合要求... Exercise 5. A final major component in concolic execution is exploring different branches of execution. Complete the implementation of
concolic_force_branchinsymex/fuzzy.pyand make sure you pass the final test case ofsymex/check-symex-int.py. Run ./check-symex-int.py ormake check to check your solution.
正如前文所说,在遇到分支时我们需要逆转当前分支条件,以探索另一分支,该函数的作用实际上就是逆转 branch_conds 中的第 b 分支的条件,并返回新的约束条件集合,那么我们只需要取出该条件并使用 sym_not() 取反后再用 sym_and() 加上该分支之前所有的条件约束即可
注意这里的参数 b 为分支标号,branch_conds 与 branch_callers 为分支的条件与调用者数组:
# Compute a new constraint by negating the branch condition of the
# b-th branch in branch_conds. This constraint can be used to force
# the concolic execution to explore the other side of branch b.
def concolic_force_branch(b, branch_conds, branch_callers, verbose = 1):
  ## Compute an AST expression for the constraints necessary
  ## to go the other way on branch b.  You can use existing
  ## logical AST combinators like sym_not(), sym_and(), etc.
  ##
  ## Note that some of the AST combinators take separate positional
  ## arguments. In Python, to unpack a list into separate positional
  ## arguments, use the '*' operator documented at
  ## https://docs.python.org/3/tutorial/controlflow.html#unpacking-argument-lists

  constraint = None
  ## Exercise 5 by arttnba3
  ### negating the branch condition of the b-th branch
  b_cond = branch_conds[b]
  if (b_cond != const_bool(True)):
    constraint = sym_not(b_cond)
    for i in range(b):
      constraint = sym_and(constraint, branch_conds[i])
  ### end

  if verbose > 2:
    callers = branch_callers[b]
    print('Trying to branch at %s:%d:' % (callers[0], callers[1]))
    if constraint is not None:
      print(indent(z3expr(constraint).sexpr()))

  if constraint is None:
    return const_bool(True)
  else:
    return constraint
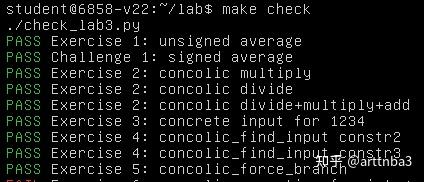
成功通过 Exercise 5:
最后是 Exercise 6, 使用我们在 Exercise 3-5 中涉及的几个函数来完成 concolic_execs() —— 完整的混合执行函数的构建,我们需要完成对 func 中的每一条分支的执行:
Exercise 6. Now implement concolic execution of a function in
concolic_execs()insymex/fuzzy.py. The goal is to eventually cause every every branch offuncto be executed. Read the comment for a proposed plan of attack for implementing that loop. The functions in the exercises 3-5 should be quite useful. Run ./check-symex-int.py ormake check to check that yourconcolic_execs()works correctly. Beware that our check for this exercise is not complete. You may well find that later on something does not work, and you will have to revisit your code for this exercise.
我们先看 concolic_execs() 中已有的逻辑框架:
checked为已经检查过的约束,outs为最后求解所得结果,inputs为待测试输入队列(输入为具体值字典)- 由一个大循环持续调用
concolic_exec_input()计算约束 - 将新的约束解添加到结果中
# Concolic execute func for many different paths and return all
# computed results for those different paths.
def concolic_execs(func, maxiter = 100, verbose = 0):
  ## "checked" is the set of constraints we already sent to Z3 for
  ## checking.  use this to eliminate duplicate paths.
  checked = set()

  ## output values
  outs = []

  ## list of inputs we should try to explore.
  inputs = InputQueue()

  iter = 0
  while iter < maxiter and not inputs.empty():
    iter += 1
    concrete_values = inputs.get()
    (r, branch_conds, branch_callers) = concolic_exec_input(func, concrete_values, verbose)
    if r not in outs:
      outs.append(r)

    ## Exercise 6: your code here.
我们的代码需要添加在大循环的后半部分,那么我们先回顾一下在 Exercise 3-5 中我们都获得了哪些可用函数:
concolic_exec_input(testfunc, concrete_values, verbose = 0):将concrete_values参数设为全局字典,之后执行给定的函数testfunc,返回执行的结果值、分支条件列表、分支调用信息列表concolic_find_input(constraint, ok_names, verbose=0):使用 Z3 求解给定约束,返回ok_names列表中变量的值concolic_force_branch(b, branch_conds, branch_callers, verbose = 1):对给定约束条件branch_conds与分支b,返回走向该分支另一路径的约束
接下来我们看 Lab 给的提示信息:
    ## Exercise 6: your code here.
    ##
    ## Here's a possible plan of attack:
    ##
    ## - Iterate over the set of branches returned by concolic_exec_input.
    ##
    ## - Use concolic_force_branch() to construct a constraint over
    ##   the inputs for taking the other side of that branch.
    ##
    ## - If this constraint is already in the "checked" set, skip
    ##   it (otherwise, add it to prevent further duplicates).
    ##
    ## - Use concolic_find_input() to construct a new input to test,
    ##   based on the above constraint.
    ##
    ## - Since Z3 might not assign values to every variable
    ##   (such as if that variable turns out to be irrelevant to
    ##   the overall constraint), inherit unassigned values from
    ##   the input that we just tried (i.e., concrete_values).
    ##   You can use the inherit() method in ConcreteValues for this.
    ##
    ## - Add the input to the queue for processing, along the lines of:
    ##
    ##     inputs.add(new_values, caller)
    ##
    ##   where caller is the corresponding value from the list of call
    ##   sites returned by concolic_find_input (i.e., branch_callers).
- 迭代
concolic_exec_input()所返回的分支集合 - 使用
concolic_force_branch()来构建一个分支的另一路径约束 - 若约束已经在
check集合中,将其跳过,否则加入集合中 - 使用
concolic_find_input()以构建一个基于另一路径约束的新的测试输入 - Z3 可能不会为每个变量分配值(例如变量可能与约束无关),我们需要从上次使用的字典继承到
concolic_find_input()返回的新字典中,将新的字典添加到input队列中
依照以上思路,笔者最后在大循环末尾补全代码如下:
    branch_len = len(branch_conds)
    # explore every branch
    for b in range(branch_len):
      # construct new constraint for negative branch
      cur_constraint = concolic_force_branch(b, branch_conds, branch_callers)
      # not in `checked` set, solve out the constraint
      if cur_constraint not in checked:
        checked.add(cur_constraint)
        sat, cur_concrete_values = concolic_find_input(cur_constraint, None)
        # satisfiable, add the dict for next round
        if sat:
          cur_concrete_values.inherit(concrete_values)
          inputs.add(cur_concrete_values, branch_callers[b])
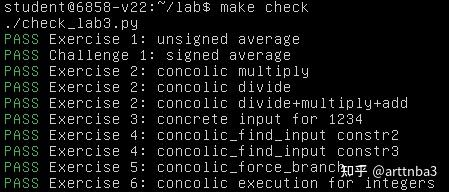
运行,成功通过 Exercise 6:
至此,Lab 3 的 Part 1 全部完成
0x04. Concolic execution for strings and Zoobar
首先是 Exercise 7,补全对字符串与字符数组的两种运算支持:长度(__len__)与包含(__contains__)
Exercise 7. Finish the implementation of concolic execution for strings and byte-arrays in
symex/fuzzy.py. We left out support for two operations onconcolic_strandconcolic_bytesobjects. The first is computing the length of a string, and the second is checking whether a particular stringaappears in stringb(i.e.,ais contained inb, the underlying implementation of Python's "a in b" construct). Look for the commentExercise 7: your code hereto find where you should implement the code for this exercise. We have already implemented thesym_containsandsym_lengthAST nodes for you, which should come in handy for this exercise. Run ./check-concolic-str.pyand ./check-symex-str.py (or just runmake check) to check that your answer to this exercise works correctly.
对于符号值而言该框架已经提供了封装好的 sym_contains 与 sym_length ,我们只需要实现对具体值的判断即可,这里别忘了最后的返回值应当调用 concolic_bool() 以在全局列表中添加路径约束与信息
待补全的两处皆为以下代码:
  ## Exercise 7: your code here.
  ## Implement symbolic versions of string length (override __len__)
  ## and contains (override __contains__).
  def __len__(self):
    return concolic_int(sym_length(ast(self)), len(self.__v))

  def __contains__(self, o):
    if isinstance(o, concolic_str):
      res = o.__v in self.__v
    else:
      res = o in self.__v
    return concolic_bool(sym_contains(ast(self), ast(o)), res)
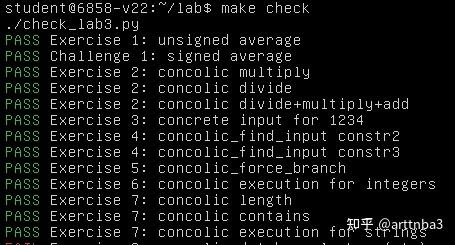
运行,成功通过 Exercise 7:
接下来我们需要在 Zoobar 中完成一个 concolic HTTP request,因此待查询的 username 也将为一个混合值(由 HTTP cookie 带来),于是接下来我们需要在 SQL 查询上应用混合执行,但 SQLite 由 C 而非 Python 编写,因此我们不能直接修改其内部代码
于是接下来来到 Exercise8,对 SQL 的 get() 应用一层 wrapper 以对 SQL 语句的结果应用混合执行:
Exercise 8. Figure out how to handle the SQL database so that the concolic engine can create constraints against the data returned by the database. To help you do this, we've written an empty wrapper around the sqlalchemy
getmethod, insymex/symsql.py. Implement this wrapper so that concolic execution can try all possible records in a database. Examine ./check-symex-sql.py to see how we are thinking of performing database lookups on concolic values. You will likely need to consult the reference for the SQLalchemy query object to understand what the behavior ofgetshould be and what your replacement implementation should be doing. Run ./check-symex-sql.py (or just runmake check) to check that your answer to this exercise works correctly.
那我们先看看 ./check-symex-sql.py 里面的主体逻辑(关于 SQLalchemy 库相关的可以先看 SQLalchemy query object ),首先声明了 Test1Base 和 Test2Base,这两个相当于两组不同的测试用例,我们仅分析其中一组即可,之后定义了类 Test1 继承自 Test1Base,并为该数据库设置了两列,其中 name 为主键:
这里按照笔者的理解,一个
Test1实例表示的应该是在该数据库中一行的数据
Test1Base = declarative_base()
Test2Base = declarative_base()

class Test1(Test1Base):
    __tablename__ = "test1"
    name = Column(String(128), primary_key=True)
    value = Column(Integer)
之后是数据库初始化工作:
def dbsetup(name, base):
    dbfile = os.path.join(dbdir, "%s.db" % name)
    engine = create_engine('sqlite:///%s' % dbfile,
                           isolation_level='SERIALIZABLE')
    base.metadata.create_all(engine)
    session = sessionmaker(bind=engine)
    return session()

def test1_setup():
    return dbsetup("test1", Test1Base)
在 test_f() 中会调用 test1_setup() 进行数据库 "test1" 的创建,并创建一个混合字符串 s,将其作为参数给到数据库的 get 函数:
def test_f():
    db = test1_setup()
    s = fuzzy.mk_str('s', '')
    r = db.query(Test1).get(s)
    if r is None:
        v = None
    else:
        v = r.value
    return v
这里的 query() 展开来其实是 SELECT test1.nameSELECT test1.name AS test1_name, test1.value AS test1_value FROM test1 这样的 SQL 语句(比较笨的办法就是可以通过在 get() 中打印 query 的方式查看),其中选择的都是我们为 Test1 类所定义的变量,而 get() 的原始作用则为从查询结果中选择符合条件的一行
完成上述定义之后,在文件中首先调用 test1_setup() 进行数据库 "test1" 的创建,并添加了两行数据:
t1 = test1_setup()
t1a = Test1()
t1a.name = 'foo'
t1a.value = 924
t1.add(t1a)
t1b = Test1()
t1b.name = 'barr'
t1b.value = 22
t1.add(t1b)
t1.commit()
最后对 test_f() 应用混合执行:
print('Testing f..')
f_results = fuzzy.concolic_execs(test_f, verbose=10)
f_expected = (924, 22)
if all(x in f_results for x in f_expected):
    print("Found all cases for f")
else:
    print("Missing some cases for f:", set(f_expected) - set(f_results))
接下来来到我们需要补全代码的 symex/symsql.py 当中,整理逻辑非常简单,只定义了一个待我们补全的 newget(),并用其替换掉了原有的 get() 函数:
## This module wraps SQLalchemy's methods to be friendly to
## symbolic / concolic execution.

import sqlalchemy.orm
from . import fuzzy

oldget = sqlalchemy.orm.query.Query.get
def newget(query, primary_key):
  ## Exercise 8: your code here.
  ##
  ## Find the object with the primary key "primary_key" in SQLalchemy
  ## query object "query", and do so in a symbolic-friendly way.
  ##
  ## Hint: given a SQLalchemy row object r, you can find the name of
  ## its primary key using r.__table__.primary_key.columns.keys()[0]
  return None

sqlalchemy.orm.query.Query.get = newget
参数 query 其实就是后面创建的 Query 对象中的 self,接下来我们看看 SQLAlchemy 文档中有没有比较有用的方法,实际上在数据库的 增删改查 当中,对于本题而言我们只需要关注“查”,注意到有这样一个方法可以将查询结果以列表的形式返回:
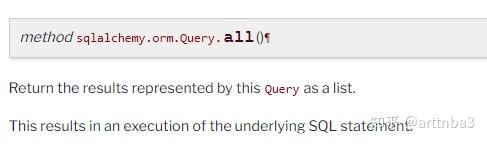
文档里没有仔细说清楚( 也可能是笔者没仔细看 ),笔者实测了一下,返回的列表的成员皆为 Test1 或 Test2 类型的对象实例,即 一行的数据,这里我们同时也可以看出在 test1 数据库中有两个 Test1(两行),刚好对应一开始添加进去的两行:
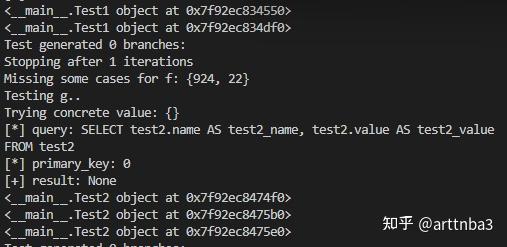
那么我们的思路其实就比较清晰了,get() 的第二个参数为 primary_key,即我们只需要对比查询结果找到其中 primary_key 的值与传入的参数值相同的那一行并将其返回即可
在待混合执行函数 test_f() 与 test_g() 当中传入的 primary_key() 皆为 concolic 类型变量,而我们已经完成了 concolic_int 与 concolic_str 的 __cmp__ 运算符重载,因此在重写的 get 函数中直接使用 == 进行对比即可
需要注意的是,虽然我们知道 Test1 的主键为 name,但这里相比起直接使用 row.name,我们需要且应当写一个更为通用的方法,在注释中提示我们可以使用 r.__table__.primary_key.columns.keys()[0] 获取主键名的字符串,因此我们可以使用 Python 的内置方法 getattr() 来获取主键的值,因此最后的代码如下:
def newget(query, primary_key):
  ## Exercise 8: your code here.
  ##
  ## Find the object with the primary key "primary_key" in SQLalchemy
  ## query object "query", and do so in a symbolic-friendly way.
  ##
  ## Hint: given a SQLalchemy row object r, you can find the name of
  ## its primary key using r.__table__.primary_key.columns.keys()[0]
  rows = query.all()

  for r in query.all():
    primary_key_in_row = getattr(r, r.__table__.primary_key.columns.keys()[0])
    if primary_key_in_row == primary_key:
      return r

  return None
运行,成功通过 Exercise 8:
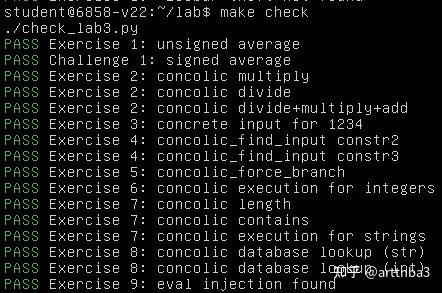
注意这里需要额外通过 Exercise 9 的第一项才表示做对了,因为后面需要借助这里的符号执行代码演示一些东西
现在我们可以开始对 Zoobar 应用我们的混合执行框架了,我们首先尝试运行 ./check-symex-zoobar.py,在其中有着对 Zoobar 使用符号输入的相关逻辑,且为了让混合执行能够快速结束,其过度约束了给予 Zoobar 的输入,此外所有的 HTTP 请求方法(于 environ['REQUEST_METHOD'] 中)皆为 GET,且请求的所有 UQL(于 environ['PATH_INFO'] 中)皆以 trans 起始
相较于直接运行,Lab 更推荐使用 script 来运行:
$ script -c ./check-symex-zoobar.py
之后屏幕上会持续打出一堆信息:
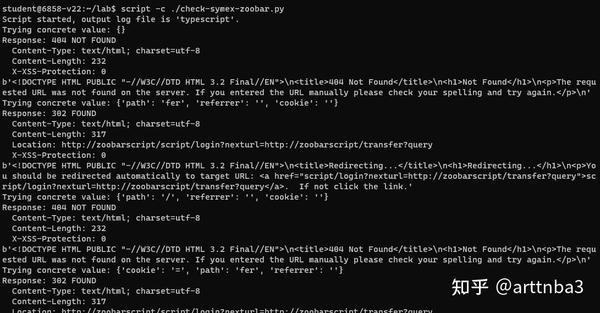
大概十几秒后结束,迭代的数量表示不同的路径:

和实验手册中不同的是笔者这里有
142 iterations,但在实验手册里是139,这里暂且先不管(
由于 Zoobar 由 Python 编写,故不会有内存损坏这一类的漏洞(这句话是实验手册说的,但是 CVE-2021-3177和一众其他 CVE 表示:怎么会是呢?),因此我们没法立刻辨明在这一百多路径中是否存在问题,因此我们需要借助一些显式的不变量(invariant)来捕捉表示安全问题的情况
Lab 已经实现了的一个不变量便是 eval injection——即对 eval() 的参数进行注入,在 symex/symeval.py 中 Lab 给出了对这种情况的检查思路:若传给 eval() 的字符串可以包含 ;badstuff(); ,说明我们发现了一个 eval injection 漏洞——由此我们可以让混合执行系统去尝试构建能包含该子串的字符串
我们可以使用如下命令查看 Zoobar 中是否存在 eval injection 漏洞:
$ script -c ./check-symex-zoobar.py | grep "Exception: eval injection"
结果如下,发现了两个 eval injection:

现在我们来看 symex/symeval.py 的内部逻辑,其逻辑比较简单,主要就是给内置的 eval() 套了一层 wrapper,检查参数是否带有 ;badstuff(); 字符串,若是则直接抛异常:
real_eval = builtins.eval
def myeval(expr, globals = None, locals = None):
  if ';badstuff();' in expr:
    raise Exception("eval injection")
  if locals is None and globals is not None:
    locals = globals
  if locals is None and globals is None:
    frame = inspect.currentframe()
    try:
      locals = frame.f_back.f_locals
      globals = frame.f_back.f_globals
    finally:
      del frame

  ## Try to evaluate the expression as an integer
  v = str_to_small_int(expr)
  if v is not None:
    return v

  return real_eval(expr, globals, locals)
builtins.eval = myeval
而在 check-symex-zoobar.py 当中,应用了混合执行框架的为 test_stuff() 函数:
fuzzy.concolic_execs(test_stuff, maxiter=500, verbose=1)
这里我们暂且先不关注 Zoobar 的实现为何,我们主要关注如何使用我们的混合执行系统来寻找其中的漏洞,在 test_stuff() 中实际上是通过将部分参数设置为混合值来进行混合执行:
def test_stuff():
  # Zoobar初始化工作
  pdb = zoobar.zoodb.person_setup()
  pdb.query(zoobar.zoodb.Person).delete()
  ##...

  ## 设置环境变量
  environ = {}
  ##...
  environ['HTTP_REFERER'] = fuzzy.mk_str('referrer', '')
  environ['HTTP_COOKIE'] = fuzzy.mk_str('cookie', '')

  ##...
接下来我们需要实现两种额外的不变量检查以检查 Zoobar 是否存在其他漏洞:
- 若没有新用户被注册,则所有用户的 Zoobar balances 之和应当在每次请求间保持一致
- 若用户
u没有向 Zoobar 进行请求,u的 Zoobar balance 不应当缩小
于是来到 Exercise 9,向 check-symex-zoobar.py 中添加相应的不变量检查:
Exercise 9. Add invariant checks to
check-symex-zoobar.pyto implement the above two rules (total balance preservation and no zoobar theft). Look for the commentExercise 9: your code hereto see where you should write this code. When you detect a zoobar balance mismatch, call thereport_balance_mismatch()function. When you detect zoobar theft, callreport_zoobar_theft(). Recall that our check for exercises 3-6, where you implemented the core of the concolic execution system, was not complete. If you are having trouble with this exercise, it may be that you did not implement exercises 3-6 correctly, so you may need to go back and fix it. To check whether your solution works correctly, you need to re-run ./check-symex-zoobar.py and see whether the output contains the messagesWARNING: Balance mismatch detectedandWARNING: Zoobar theft detected. Alternatively, you can runmake check, which will do this for you (runcheck-symex-zoobar.pyand look for these magic strings).
在 Zoobar 中实际上是通过 zoobar.app() 来完成 HTTP 请求的解析实现,因此在 test_stuff() 中选择直接构造请求(environ 字典)传递给该函数来模拟向 Zoobar 发送 HTTP 请求的过程:
  environ = {}
  ##...
  environ['REQUEST_METHOD'] = 'GET'
  environ['PATH_INFO'] = 'trans' + fuzzy.mk_str('path', '')

  if environ['PATH_INFO'].startswith('//'):
    ## Don't bother trying to construct paths with lots of slashes;
    ## otherwise, the lstrip() code generates lots of paths..
    return

  resp = zoobar.app(environ, startresp)
  if verbose:
    for x in resp:
      print(x)
  ##...
我们对代码的检查则是在请求完成后进行的,首先是对 balance 的检查,这里不了解 Zoobar 的相关结构(或者没来得及/懒得看)也不要紧,在 test_stuff() 的开头有这样的计算 balances 总和的逻辑:
def test_stuff():
  pdb = zoobar.zoodb.person_setup()
  pdb.query(zoobar.zoodb.Person).delete()
  adduser(pdb, 'alice', 'atok')
  adduser(pdb, 'bob', 'btok')
  # 计算 balance 总和
  balance1 = sum([p.zoobars for p in pdb.query(zoobar.zoodb.Person).all()])
对于单个用户而言我们可以使用 person.zoobars 获取其 balance,而我们可以通过 pdb.query(zoobar.zoodb.Person).all() 获取用户对象列表 ,那么我们只需要在请求结束后使用同样的逻辑计算当前的 balance,并与原 balance 对比即可,若不一致则按手册说明调用 report_balance_mismatch() 即可:
  ## Exercise 9: your code here.

  ## Detect balance mismatch.
  ## When detected, call report_balance_mismatch()
  balance2 = sum([p.zoobars for p in pdb.query(zoobar.zoodb.Person).all()])
  if balance1 != balance2:
    report_balance_mismatch()
然后是第二个问题,我们需要找到没有进行操作但是 balance 缩小了的用户(即发生转出),由于在测试函数中仅进行了一次操作,故未进行操作的用户的 balance 不应当小于初始值(但是可以大于,因为可以有别的账户向其进行转入),因此我们需要知道一个用户的初始信息
在 test_stuff() 开头便对应创建了两个数据库,因此我们可以从其定义入手:
def test_stuff():
  pdb = zoobar.zoodb.person_setup()
  pdb.query(zoobar.zoodb.Person).delete()
  adduser(pdb, 'alice', 'atok')
  adduser(pdb, 'bob', 'btok')
  balance1 = sum([p.zoobars for p in pdb.query(zoobar.zoodb.Person).all()])
  pdb.commit()

  tdb = zoobar.zoodb.transfer_setup()
  tdb.query(zoobar.zoodb.Transfer).delete()
  tdb.commit()
  ##...
在 zoobar/zoodb.py 中定义了 Person 数据库,其中 balance(也就是 zoobars 字段)的初始值为 10,同时主键为 username :
class Person(PersonBase):
    __tablename__ = "person"
    username = Column(String(128), primary_key=True)
    password = Column(String(128))
    token = Column(String(128))
    zoobars = Column(Integer, nullable=False, default=10)
    profile = Column(String(5000), nullable=False, default="")
在该文件中还定义了 Transfer 数据库,应当用以表示单次交易的双方及数值:
class Transfer(TransferBase):
    __tablename__ = "transfer"
    id = Column(Integer, primary_key=True)
    sender = Column(String(128))
    recipient = Column(String(128))
    amount = Column(Integer)
    time = Column(String)
那么我们不难想到的是,我们可以遍历 Person 数据库以获得所有用户的用户名集合,接下来遍历 Transfer 数据库来将用户名集合中的非 sender 给剔除(因为我们主要关注 recipient 发生了 balance 缩小的情况),最后检查剩余用户是否存在 balance 小于初始值的情况,若是则说明存在漏洞:
  ## Detect zoobar theft.
  ## When detected, call report_zoobar_theft()
  udict = {}
  for p in pdb.query(zoobar.zoodb.Person).all():
    udict[p.username] = p
  for t in tdb.query(zoobar.zoodb.Transfer).all():
    udict.pop(t.sender)
  for username in udict.keys():
    if udict[username].zoobars < 10:
      report_zoobar_theft()
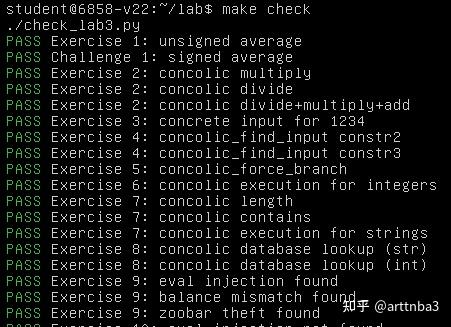
成功通过 Exercise 9:
最后是 Exercise 10,修复 balance mismatch 和 zoobar theft 这两个漏洞(Lab 已经替我们修好了 eval injection 的漏洞),需要注意的是这里评测系统要求将存在问题的源码文件拷贝到 zoobar-fixed 下再进行修复,:
Exercise 10. Fix the two bugs you found in Exercise 9, by copying whatever
.pyfiles you need to modify from thezoobardirectory tozoobar-fixedand changing them there. Recall that our check for exercises 3-6, where you implemented the core of the concolic execution system, was not complete. If you are having trouble with this exercise, it may be that you did not implement exercises 3-6 correctly, so you may need to go back and fix it. To check whether your solution works correctly, you need to run ./check-symex-zoobar-fixed.sh and see whether the output still contains the messagesException: eval injection,WARNING: Balance mismatch detectedandWARNING: Zoobar theft detected. Alternatively, you can runmake check, which will do this for you.
那么我们首先要找到漏洞出现的位置,笔者最初的思路是在两个找到漏洞的 report 函数进行约束求解就可以获得造成问题的输入,但是这个做法并不可行,因为本 Lab 提供的混合执行框架是高度封装好的,在 concolic_execs() 的执行过程中我们是没办法中途停下来进行约束求解的
笔者思考了半天怎么改才能在
test_stuff()的两个 report() 函数进行约束求解来得到触发漏洞的输入,后面发现基本没啥可行性,实在要弄的话需要对整个框架进行大改,故就此作罢改换思路...
我们重新思考一个问题: Lab 3 为什么提供的是混合执行框架而非纯符号执行或是纯具体执行呢?
正如前文所言,concolic execution 的诞生便是为了解决 symbolic execution 与 concrete execution 所分别存在的问题,融合两者的特性来达到一个更好的效果
现在让我们重新审视 concolic_execs() 的执行流程:
-
由一个外层大循环不断迭代
-
从输入队列中取出具体值字典
-
调用
concolic_exec_input()执行目标函数,获取到返回值、分支条件列表、分支调用方列表 -
将得到的新的返回值添加至
outs集合 -
内层小循环遍历分支条件列表
- 调用
concolic_force_branch()获取将当前分支条件逆转后的约束条件 - 若该约束不在
checked(已验证约束集合)中,添加,并调用concolic_find_input()进行约束求解 - 约束可解,将结果添加到下一次作为输入的具体值字典中
- 调用
-
我们不难得知的是,当 test_stuff() 报告漏洞时,说明我们的 concolic execution system 给出了一个能够触发漏洞的 concrete input
我们可以使用如下语句来将输出重定向至当前目录下的 typescript 文件:
$ script -c ./check-symex-zoobar.py
前面我们用到的两个 report() 函数实际上就只是 print() 而已,我们只需要在输出结果中搜索对应的字符串即可:
def report_balance_mismatch():
  print("WARNING: Balance mismatch detected")

def report_zoobar_theft():
  print("WARNING: Zoobar theft detected")
以下是两个例子:
Trying concrete value: {'form_recipient_present': 1, 'form_zoobars_present': 1, 'form_zoobars_val': '-10', 'rsplit_split_cookie_=_r_#_r': 'atok', 'rsplit_split_cookie_=_r_#_l': 'alice', 'split_cookie_=_r': 'alice#atok', 'split_cookie_=_l': 'PyZoobarLogin', 'cookie': 'PyZoobarLogin=alice#atok', 'path': 'fer', 'form_recipient_val': 'alice', 'referrer': ''}
Response: 200 OK
  Content-Type: text/html; charset=utf-8
  Content-Length: 1689
  X-XSS-Protection: 0
b'<!DOCTYPE html>\n<html>\n    <head>\n        <meta charset="utf-8">\n        <link rel="stylesheet" type="text/css...
# response,比较长且无意义,这里暂且省略
WARNING: Balance mismatch detected
Trying concrete value: {'form_recipient_present': 1, 'form_zoobars_present': 1, 'form_zoobars_val': '-10', 'rsplit_split_cookie_=_r_#_r': 'atok', 'rsplit_split_cookie_=_r_#_l': 'alice', 'split_cookie_=_r': 'alice#atok', 'split_cookie_=_l': 'PyZoobarLogin', 'cookie': 'PyZoobarLogin=alice#atok', 'path': 'fer', 'form_recipient_val': 'bob', 'referrer': ''}
Response: 200 OK
  Content-Type: text/html; charset=utf-8
  Content-Length: 1686
  X-XSS-Protection: 0
b'<!DOCTYPE html>\n<html>\n    <head>\n        <meta charset="utf-8">\n        <link rel="stylesheet" type="tex...
# response,比较长且无意义,这里暂且省略
WARNING: Zoobar theft detected
参数的含义不难辨认,form_zoobars_val 为单次 transfer 的数值,cookie 表示发送方用户名及 cookie,form_recipient_val 表示接收方用户名,那么这里我们可以推断出至少可能存在两个漏洞:
- 未对负数的 transfer 进行过滤,导致一个用户可以盗取另一用户的 balance
- 未对 self-transfer 的情况做合适处理,导致最后总的 balance 不一致
但这个时候我们只知道 漏洞是存在的 ,而不知道 漏洞在何处 ,那这里我们需要再审一审日志别的地方,我们不难发现会有一些抛异常的日志:
Trying concrete value: {'form_recipient_present': 1, 'form_zoobars_present': 1, 'rsplit_split_cookie_=_r_#_r': 'atok', 'rsplit_split_cookie_=_r_#_l': 'alice', 'split_cookie_=_r': 'alice#atok', 'split_cookie_=_l': 'PyZoobarLogin', 'cookie': 'PyZoobarLogin=alice#atok', 'path': 'fer', 'form_zoobars_val': '1', 'referrer': '', 'form_recipient_val': ''}
Traceback (most recent call last):
  File "/home/student/lab/zoobar/transfer.py", line 16, in transfer
    bank.transfer(g.user.person.username,
  File "/home/student/lab/zoobar/bank.py", line 12, in transfer
    recipient_balance = recipientp.zoobars + zoobars
AttributeError: 'NoneType' object has no attribute 'zoobars'
Response: 200 OK
  Content-Type: text/html; charset=utf-8
  Content-Length: 1683
  X-XSS-Protection: 0
b'<!DOCTYPE html>\n<html>\n    <head>\n        <meta charset="utf-8">\n
# response,比较长且无意义,这里暂且省略
说明主要的处理逻辑应当是在 zoobar/bank.py 中的 transfer() 函数,接下来就是代码审计+修复环节了,该函数的核心逻辑主要就是开头这一段:
def transfer(sender, recipient, zoobars):
    persondb = person_setup()
    senderp = persondb.query(Person).get(sender)
    recipientp = persondb.query(Person).get(recipient)

    sender_balance = senderp.zoobars - zoobars
    recipient_balance = recipientp.zoobars + zoobars

    if sender_balance < 0 or recipient_balance < 0:
        raise ValueError()

    senderp.zoobars = sender_balance
    recipientp.zoobars = recipient_balance
    persondb.commit()

    ##...
可以看出:
- 缺失了对 transfer 数量为负的检查
- 重复赋值导致对 self-transfer 的情况计算错误
修改的办法其实比较简单,由于 username 为主键,故若 sender == recipient,直接跳过转账操作即可,同时对 transfer 数量为负数的情况直接转为 0 即可:
def transfer(sender, recipient, zoobars):
    # for zoobars < 0, convert it to 0
    if zoobars < 0:
        zoobars = 0

    # if self-transfer, we don't need to do anything
    if sender != recipient:
        persondb = person_setup()
        senderp = persondb.query(Person).get(sender)
        recipientp = persondb.query(Person).get(recipient)

        sender_balance = senderp.zoobars - zoobars
        recipient_balance = recipientp.zoobars + zoobars

        if sender_balance < 0 or recipient_balance < 0:
            raise ValueError()

        senderp.zoobars = sender_balance
        recipientp.zoobars = recipient_balance
        persondb.commit()

    ##...
运行,成功通过所有检查
至此,Lab 3 全部完成